Aktualizacja do nowej wersji lub inny branch
Build yourself instead of download
AndroidAPS is not available as download due to regulation for medial devices. It is legal to build the app for your own use but you must not give a copy to others! See FAQ page for details.
Important notes
- As of version 2.3 you have to use git to update. Updating via zip file does not work anymore.
- Please use Android Studio Version 3.5.1 or newer to build the apk.
- Windows 10 32-bit systems are not supported by Android Studio 3.5.1.
- If you are using xDrip make sure to identify the receiver.
- If you are using Dexcom G6 with the patched Dexcom app you will need the version from the 2.4 folder.
Quick walk-through for experienced users
Please skip this paragraph if you update for the first time. The quick walk-through is for experienced users. Your next step would be to install git if you do not have it already.
If you already updated AAPS in previous versions and use a Windows PC you can update in four simple steps:
- Export your settings from the existing AAPS version on your phone to be on the save side
- Update local copy (VCS->Git->Pull)
- Generate signed APK (Select ‘app’ instead of ‘wear’ on your way!)
- Depending on your BG source make sure to identify receiver in xDrip or use the patched Dexcom app from the 2.4 folder.
Install git (if you don’t have it)
Follow the manual on the git installation page.
Update your local copy
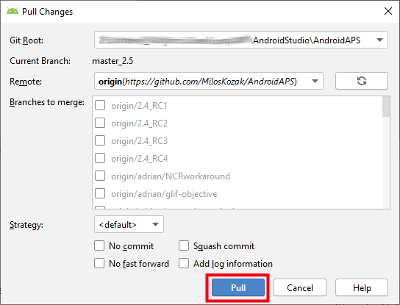
Click: VCS -> Git -> Pull
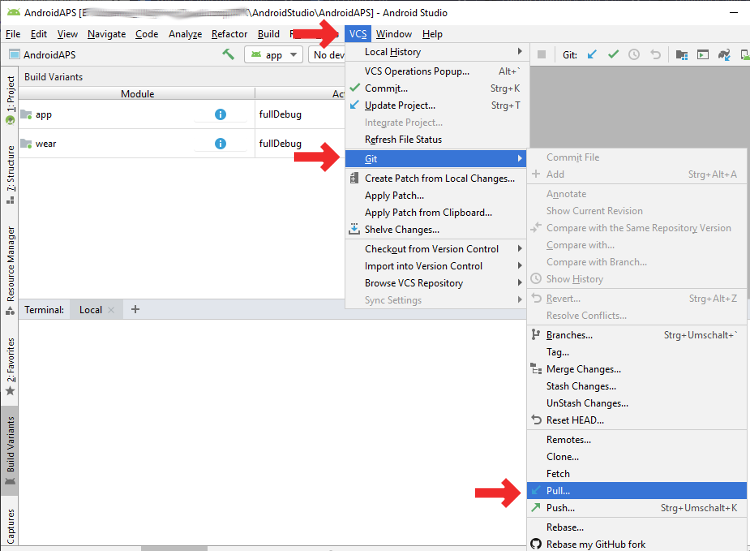
Click Pull (no changes in dialog field)
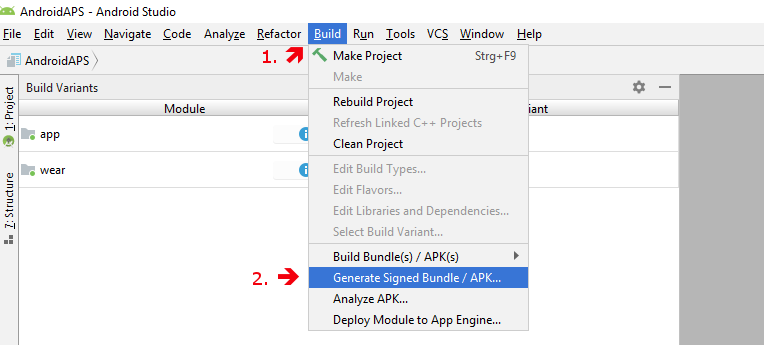
Generate signed APK
In the menu select "Build" and then "Generate Signed Bundle / APK...". (The menu in Android Studio changed as of September 2018. In older versions select in the menu “Build” and then “Generate Signed APK...”.)Signing means that you sign your generated app but in a digital way as a kind of digital fingerprint in the app itself. That is necessary because Android has a rule that it only accepts signed code to run for security reasons. For more information on this topic, follow the link here Security is a deep and complex topic and you don’t need this now.
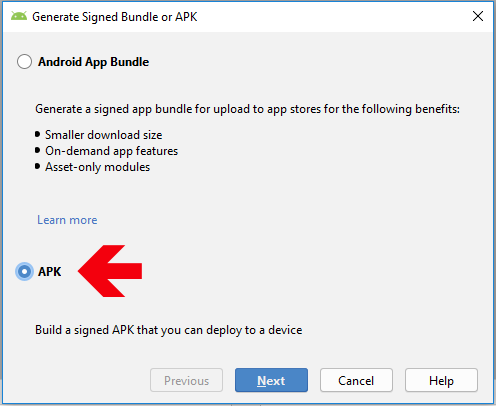
In the following dialogue box select “APK” instead of “Android App Bundle” and click button “Next”.
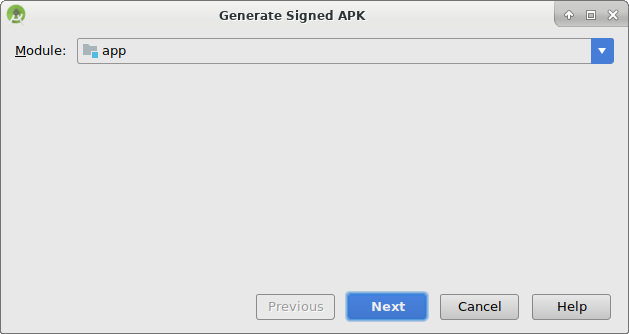
Select “app” and click “Next”.
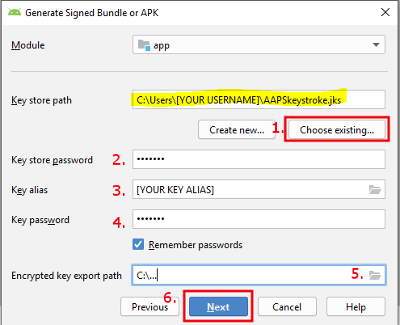
Enter your key store path, enter key store password, select key alias and enter key password.
Select ‘Remember passwords’.
Then click next.
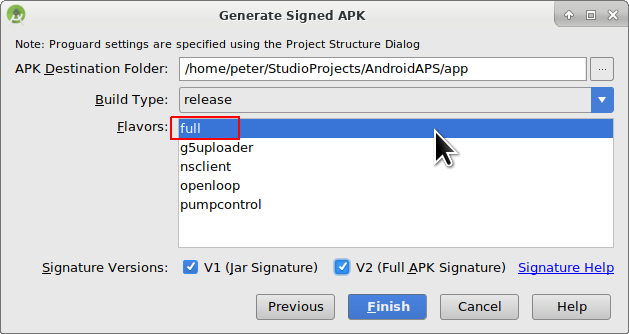
Select “full” (or “fullRelease”) as flavour for the generated app. Select V1 “Jar Signature” (V2 is optional) and click “Finish”. The following information might be important for later use.
- ‘Release’ should be your default choice for “Build Type”, ‘Debug’ is just for people coding.
- Select the build type you want to build.
- full / fullRelease (i.e. recommendations automatically enacted in closed looping)
- openloop (i.e. recommendations given to user to manually enact)
- pumpcontrol (i.e. remote control for pump, no looping)
- nsclient (i.e. looping data of another user is displayed and careportal entries can be added)
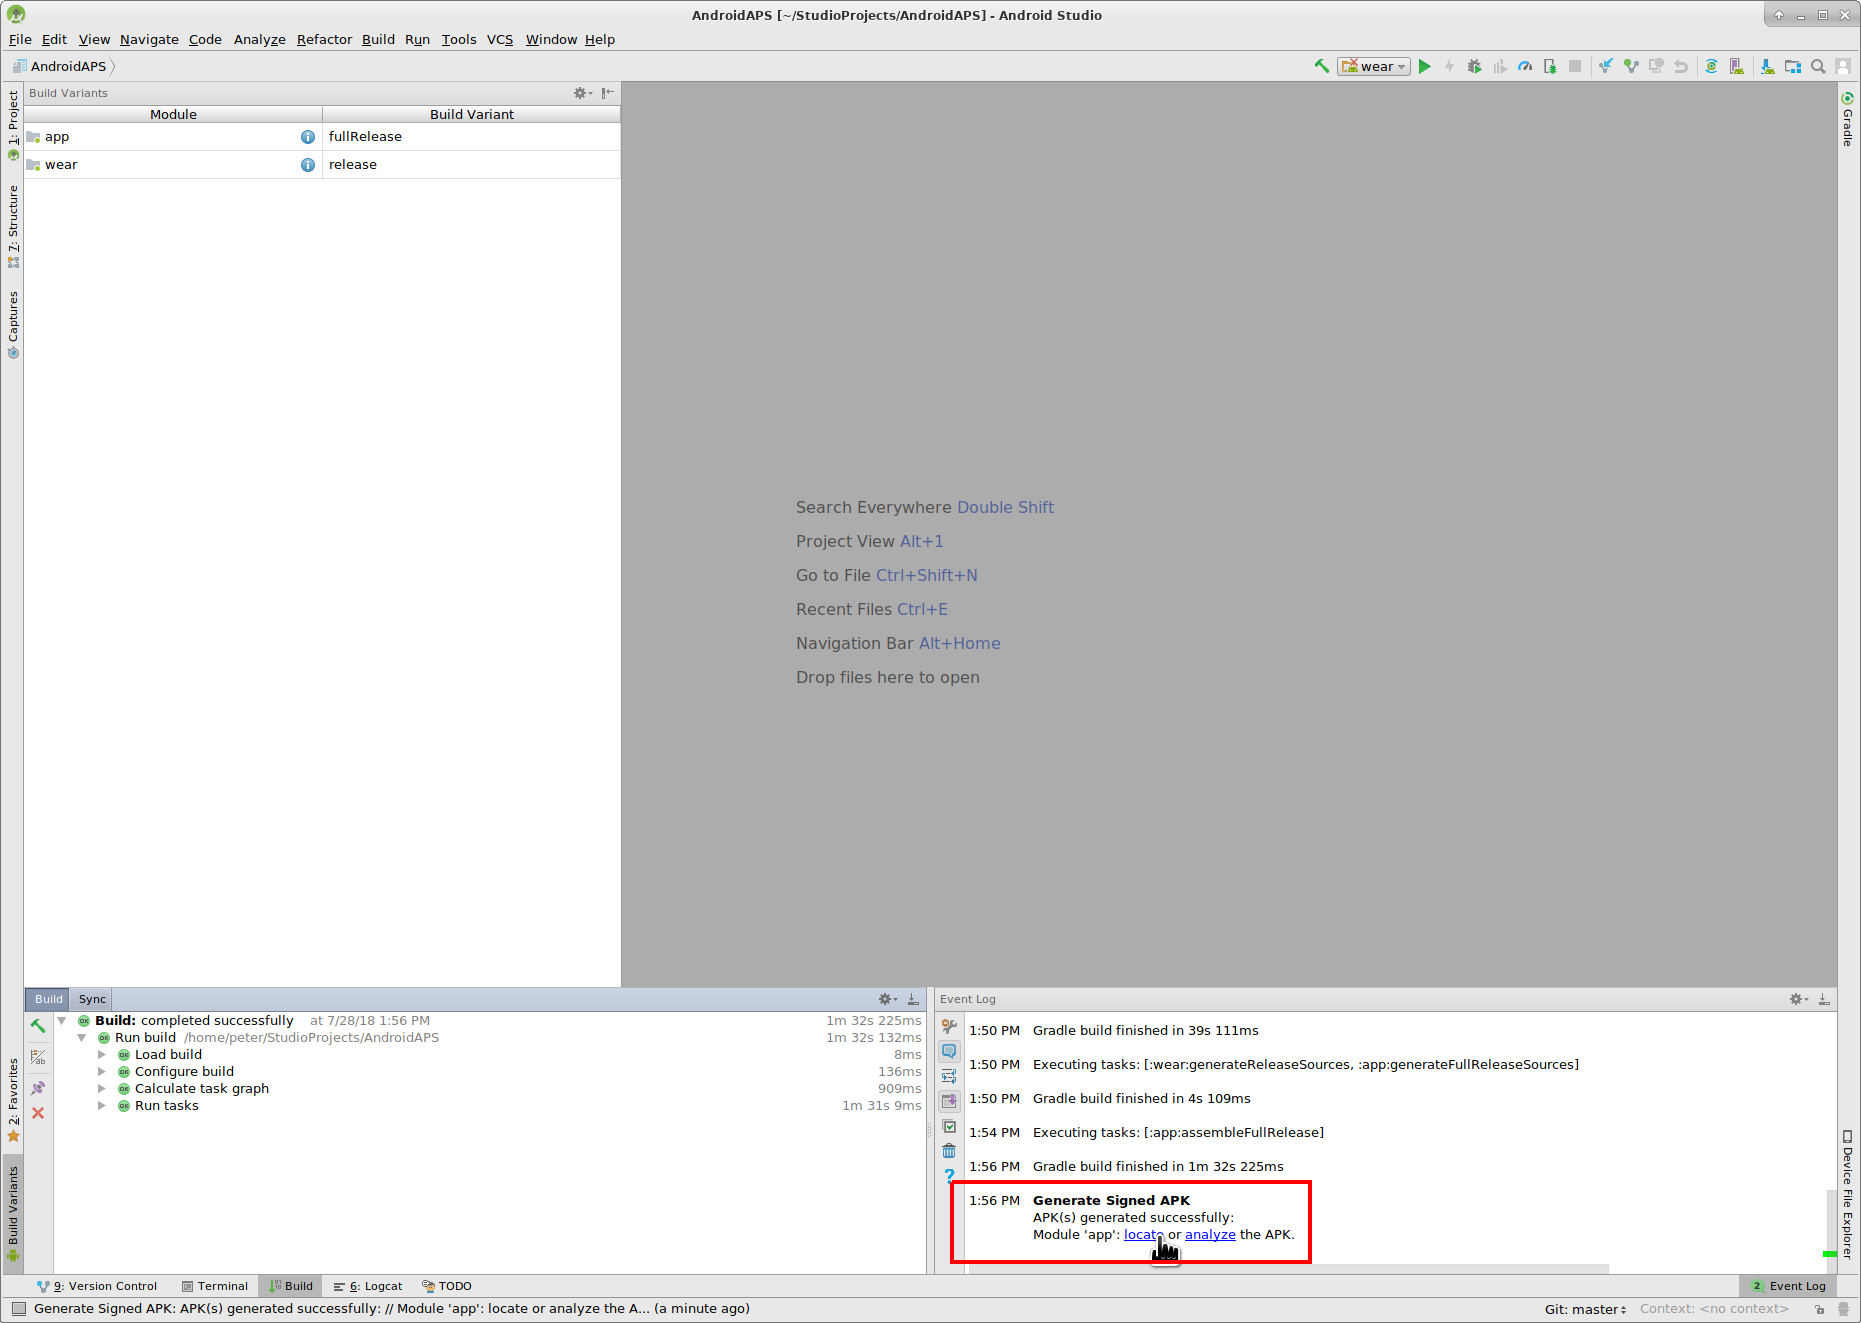
In the event log you see that the Signed APK was generated successfully.
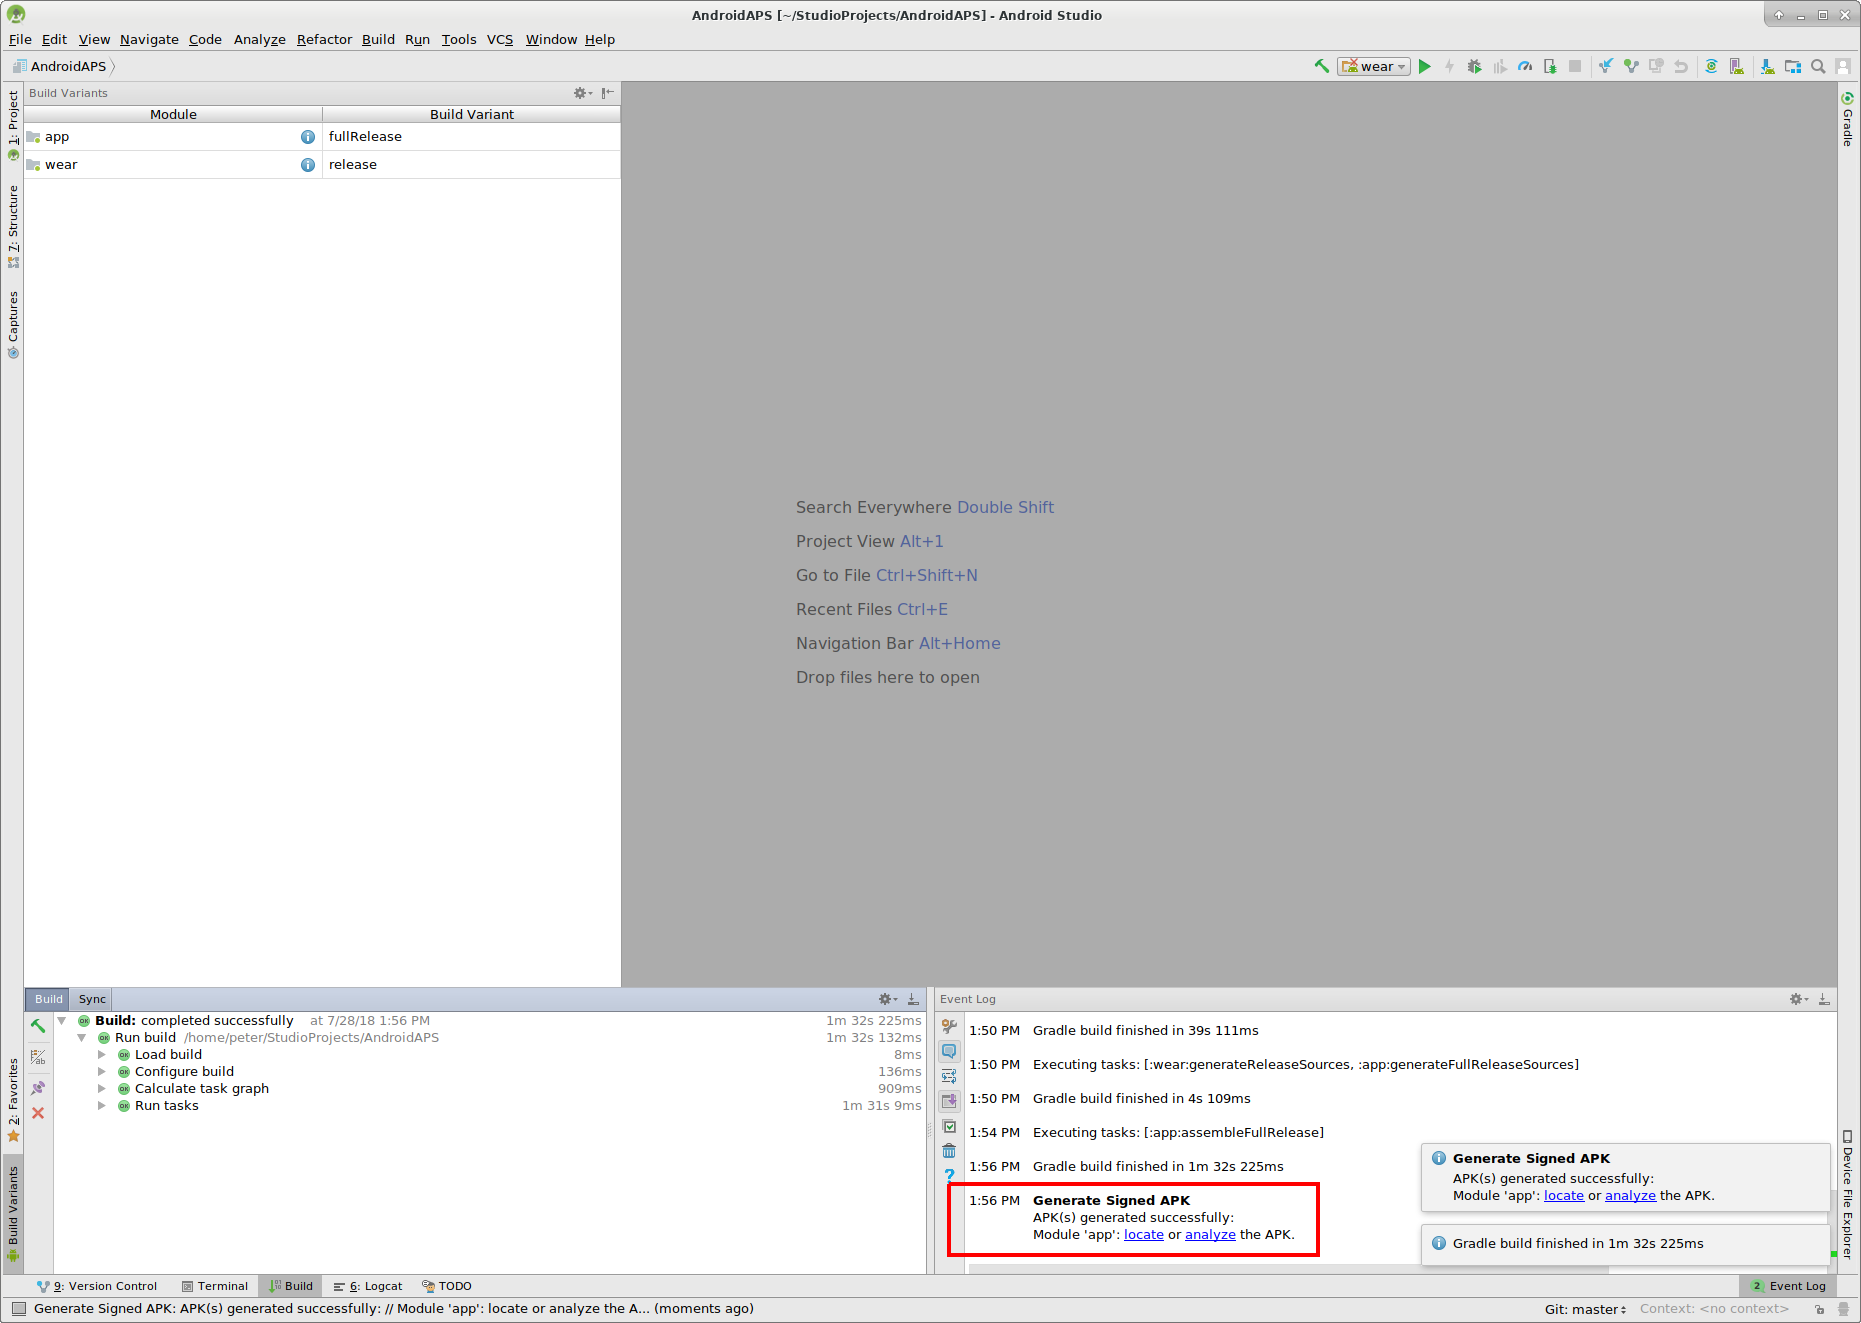
Click the “locate” link in the event log.
Transfer APK to smartphone
Export your settings from the existing AAPS version on your phone to be on the save side.
A file manager window opens. It might look a bit different on your system as I am using Linux. On Windows there will be the File Explorer and on Mac OS X the Finder. There you should see the directory with the generated APK file. Unfortunately this is the wrong place as "wear-release.apk" is not the signed "app" APK we are searching for.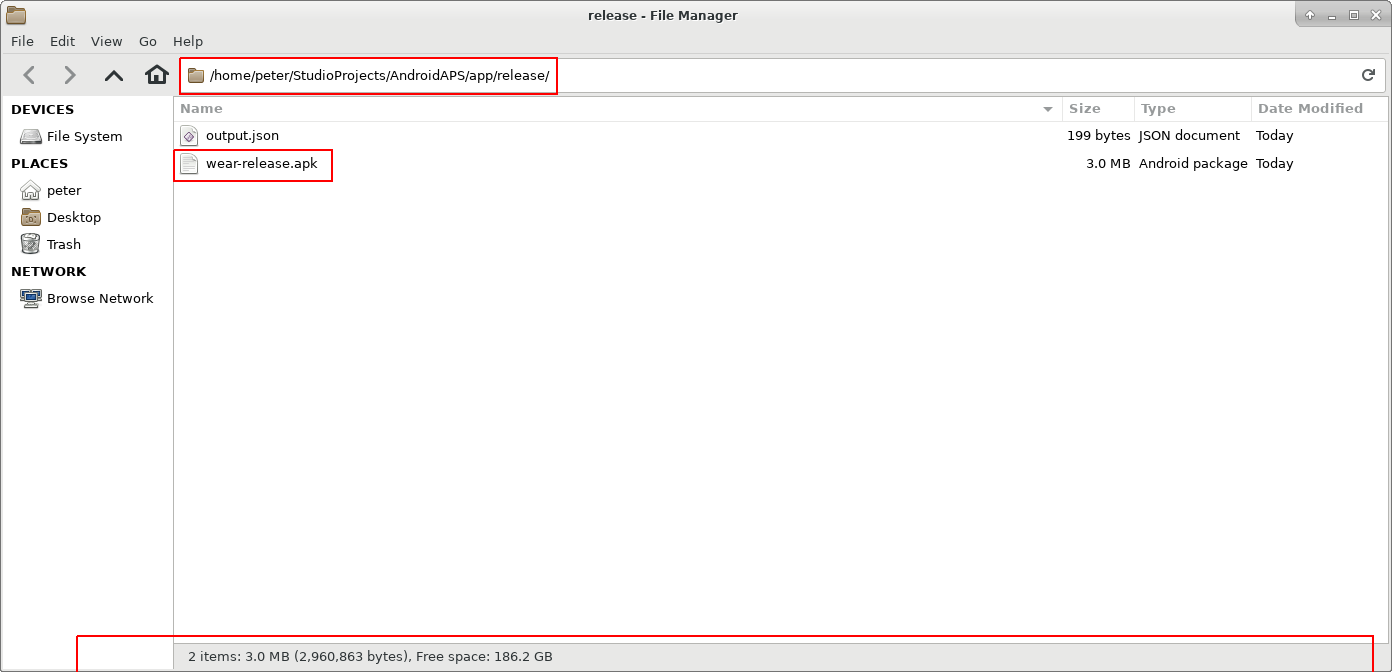
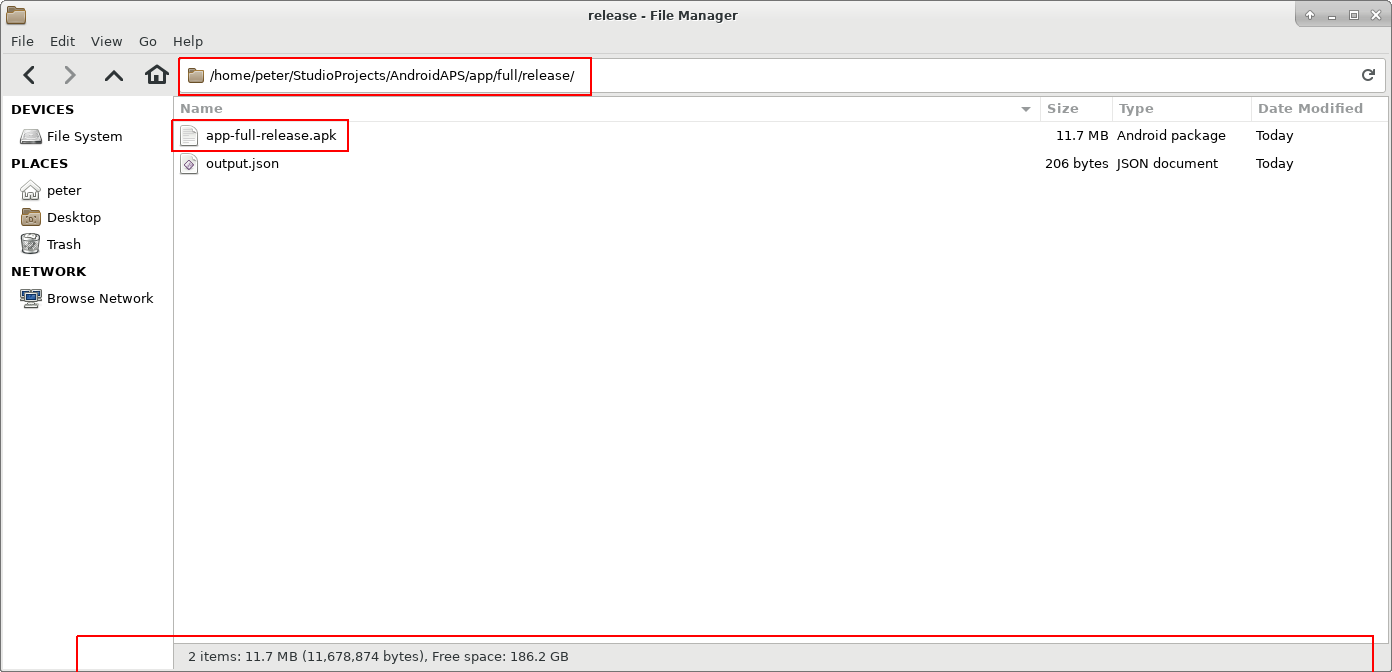
Please change to the directory AndroidAPS/app/full/release to find the “app-full-release.apk” file. Transfer this file to your Android smartphone. You can do it on your preferred way:
- Bluetooth
- cloud upload (Google Drive or other cloud services)
- connect computer and phone by cable
- by mail (Note that some mail apps do not allow apk attachments, in this case use other transfer method.)
In this example Gmail is used as it is fairly simple. To install the self-signed app you need to allow Android on your smartphone to do this installation even if this file is received via Gmail which is normally forbidden. If you use something other please proceed accordingly.
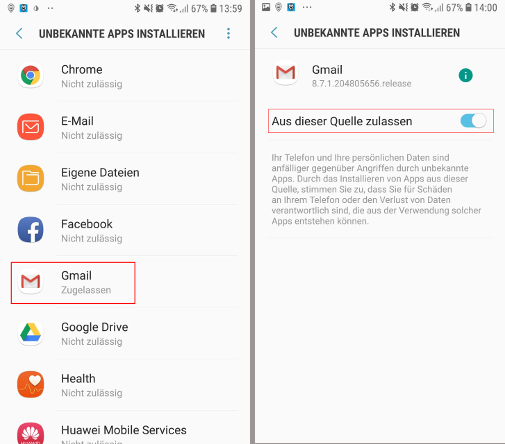
In the settings of your smartphone there is an area “unknown apps install” where I have to give Gmail the right to install APK files which I get via Gmail.
Select “Allow from this source”. After the installation, you can disable it again.
The last step is to press on the APK file I got via Gmail and install the app. If the APK does not install and you have an older version of AndroidAPS on your phone that was signed with a different key then you will need to uninstall this first, remember to export your settings if so!
Yeah, you got it and can now start with configuring AndroidAPS for your use (CGMS, insulin pump) etc.
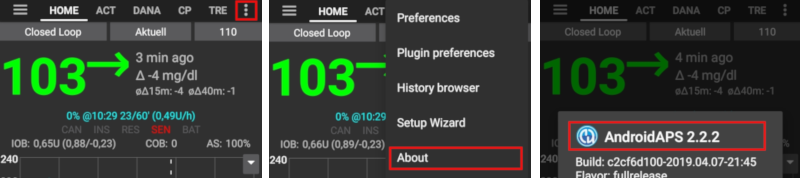
Check AAPS version on phone
You can check the AAPS version on your phone by clicking the three dots menu on the top right and then about.
Rozwiązywanie problemów
See separate page troubleshooting Android Studio.