Δημιουργώντας την εφαρμογή APK
Φτιάξτε το μόνοι σας, αντί να το κατεβάσετε
AndroidAPS δεν είναι διαθέσιμο για κατέβασμα λόγω κανονισμού για τις ιατρικές συσκευές. Είναι νόμιμο να χτίσει η εφαρμογή για δική σας χρήση, αλλά δεν πρέπει να δώσετε αντίγραφο σε άλλους! Δείτε το σελίδα FAQ για λεπτομέρειες.
## Σημαντικές σημειώσεις
- Please use Android Studio Version 3.5.1 or newer to build the apk.
- Windows 10 32-bit systems are not supported by Android Studio 3.5.1.
Configuration on demand is not supported by the current version of the Android Gradle plugin!
Εάν η κατασκευή σας αποτύχει με σφάλμα σχετικά με τη διαμόρφωση “κατά παραγγελία”, μπορείτε να κάνετε τα εξής:
- Open the Preferences window by clicking File > Settings (on Mac, Android Studio > Preferences).
- In the left pane, click Build, Execution, Deployment > Compiler.
- Uncheck the Configure on demand checkbox.
- Click Apply or OK.
Αυτό το άρθρο χωρίζεται σε δύο μέρη.
- In the overview part there is an explanation on what steps are necessary to build the APK file.
- In the step by step walkthrough part you will find the screenshots of a concrete installation. Because the versions of Android Studio - the software development environment which we will use to build the APK - will change very quickly this will be not identical to your installation but it should give you a good starting point. Android Studio also runs on Windows, Mac OS X and Linux and there might be small differences in some aspects between each platform. If you find that something important is wrong or missing, please inform the facebook group “AndroidAPS users” or in the Gitter chats Android APS or AndroidAPSwiki so that we can have a look at this.
Μία γενική ιδέα
In general, the steps necessary to build the APK file:
- Install git
- Install and setup Android Studio.
- Use git to clone the source code from the central Github repository where the developers have put the actual code for the app.
- Open the cloned project in Android Studio as active project.
- Build the signed APK.
- Transfer the signed APK to your smartphone.
Step by step walkthrough
Detailed description of the steps necessary to build the APK file.
Εγκαταστήστε το git (αν δεν το έχετε)
Follow the manual on the git installation page.
Install Android Studio
The following screenshots have been taken from Android Studio Version 3.1.3. Your screen might look a bit different depending on the Android Studio version you use. But you should be able to find your way through. Help from the community is provided for example in the AndroidAPS Facebook group and other places.
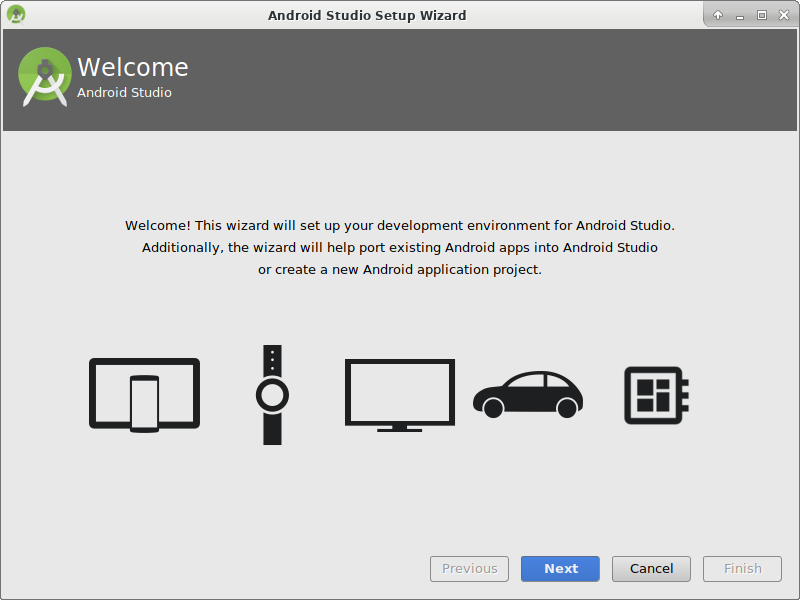
Install Android Studio and setup during first start.
Select “Do not import settings” as you have not used it before.
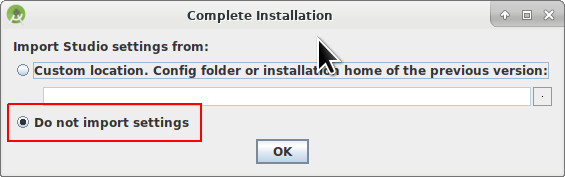
Click “Next”.
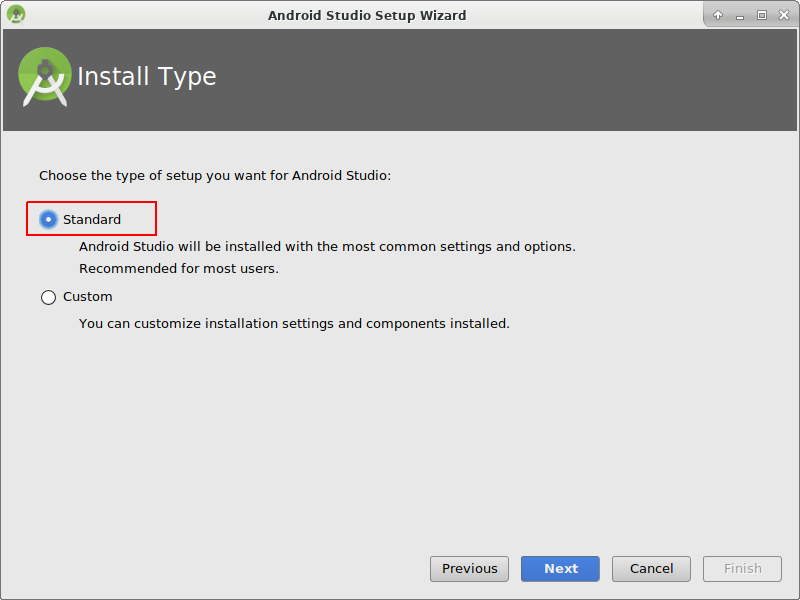
Select “Standard” installation and click “Next”.
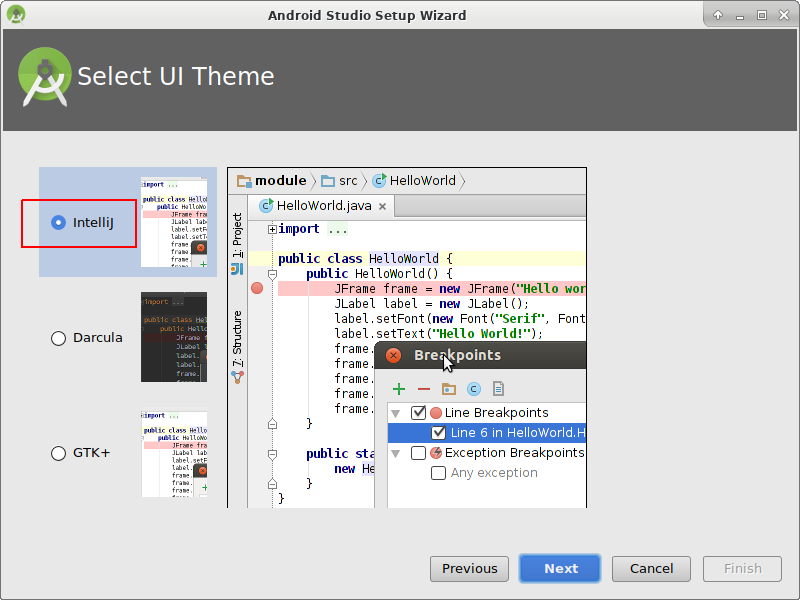
Select the theme for the user interface you like. (In this manual we used “Intellij”. Then click “Next”. This is just the color scheme. You can select any you like (i.e. “Darcula” for dark mode). This selection has no influence on building the APK.
Click “Next” on the “Verify Settings” dialog.
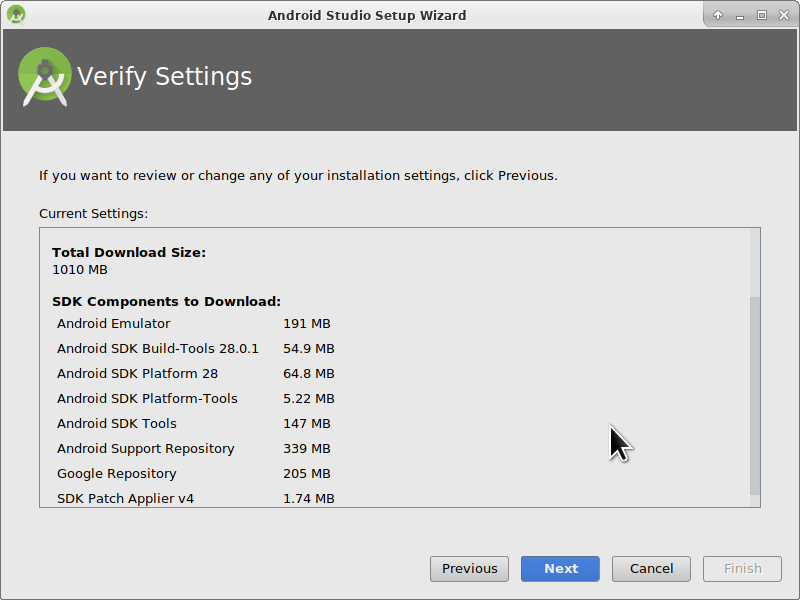
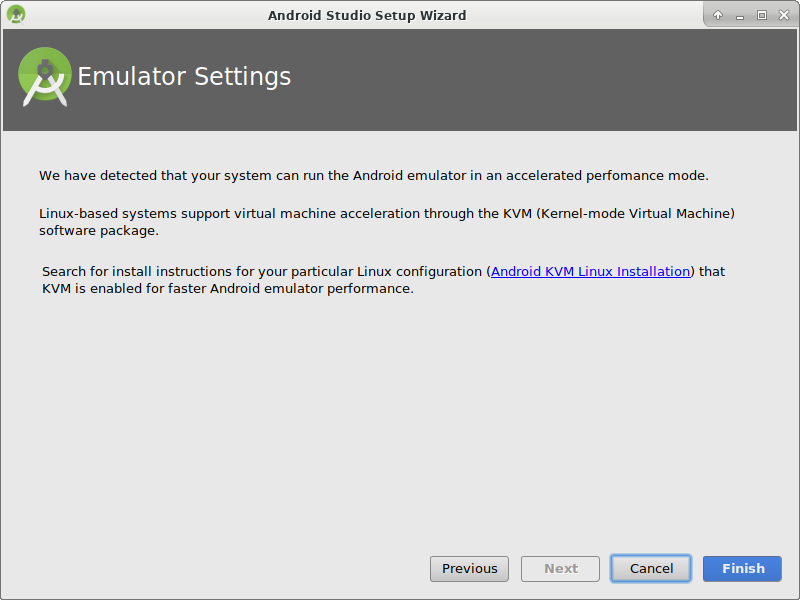
The Android emulator (to emulate the smartphone on your PC or Mac) is not used to build the APK. You can click “Finish” to finish the installation and read the documentation later on demand.
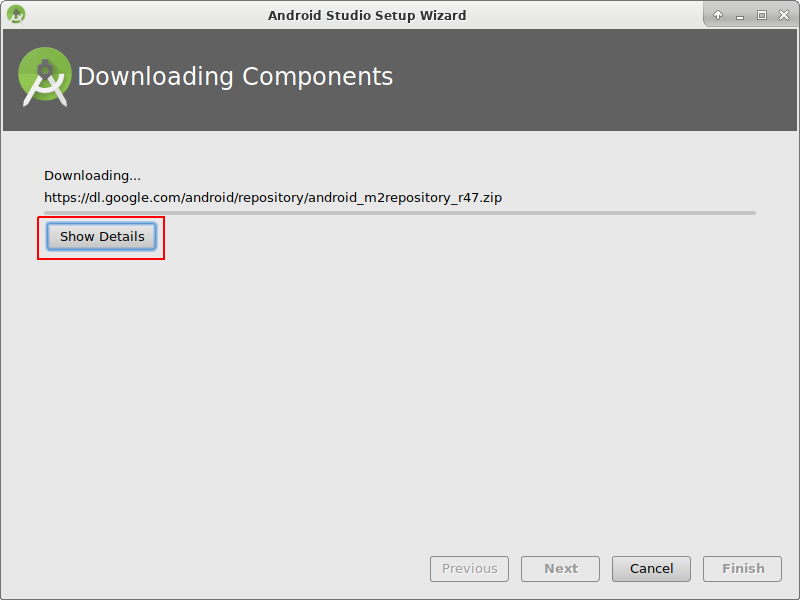
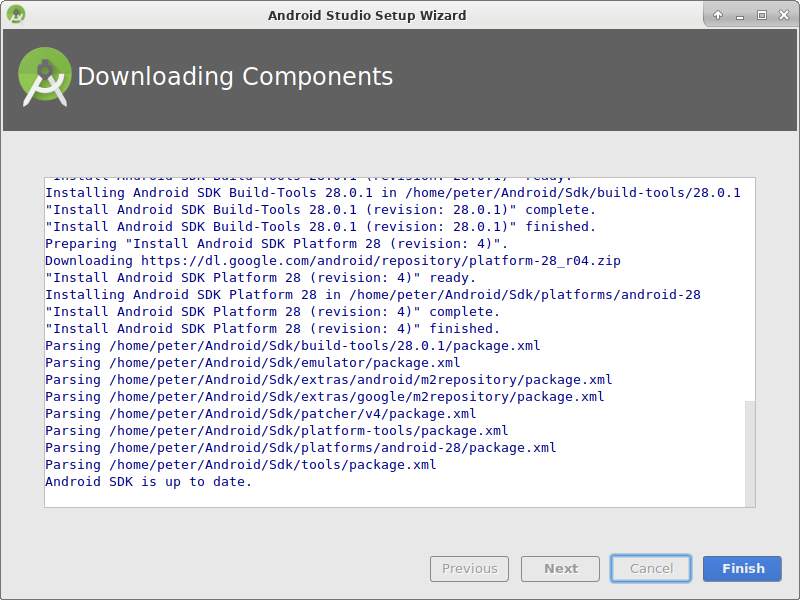
Android Studio is downloading a lot of software components it uses. You can click on the “Show Details” button to the what happens but that’s not important at all.
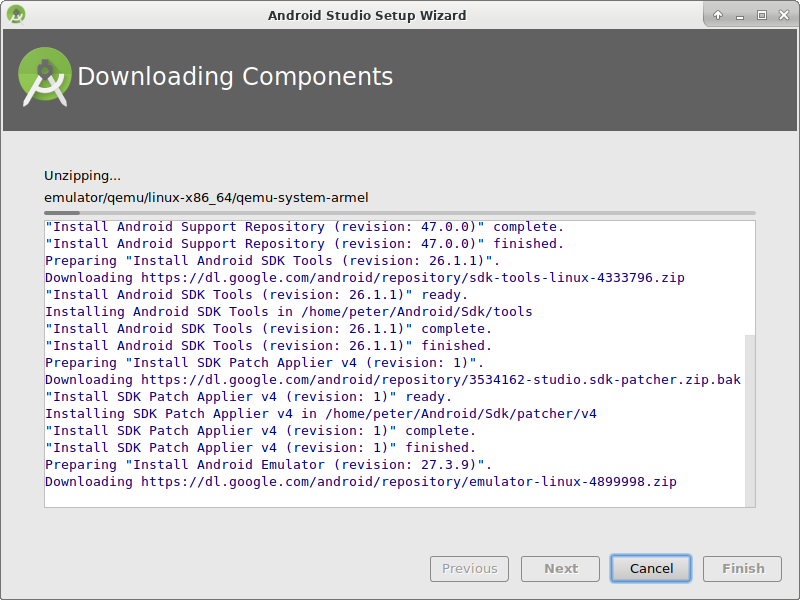
After the downloads are completed click the “Finish” button.
- Applause, applause you have now finished the Android Studio installation and can start cloning the source code. Maybe it’s time for a short break?
Set git path in preferences
Windows
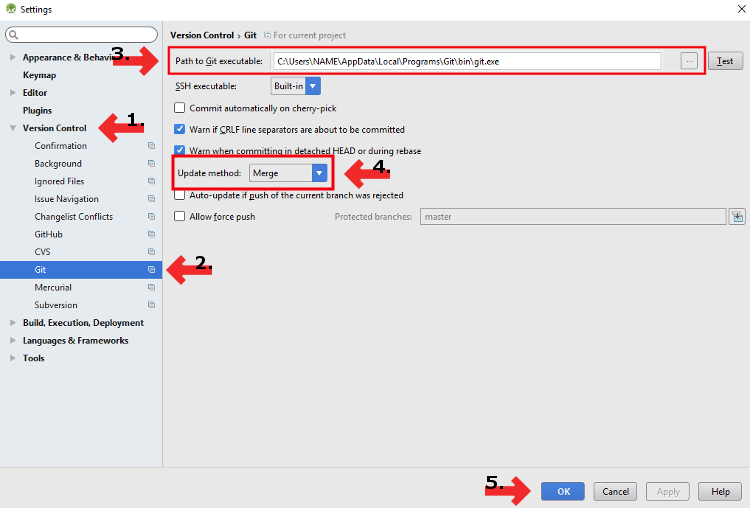
Let Studio know where is git.exe located: File - Settings

In the next window: Version Control - Git
Choose correct path: .../Git/bin
Make sure update method “Merge” is selected.
Mac
- If you install git via homebrew there is no need to change any preferences. Just in case: They can be found here: Android Studio - Preferences.
Download code and additional components
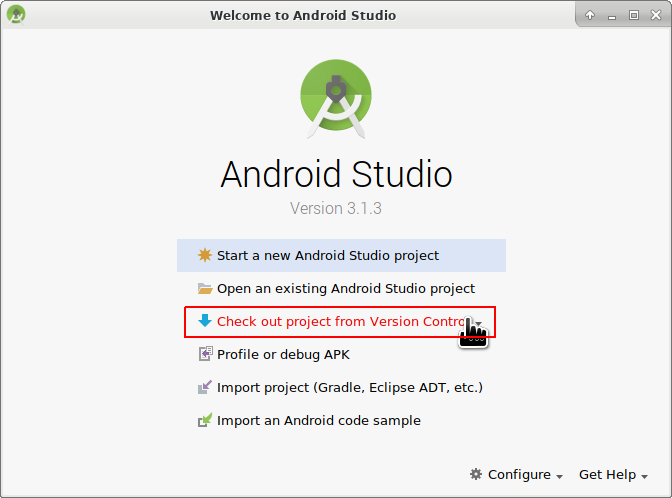
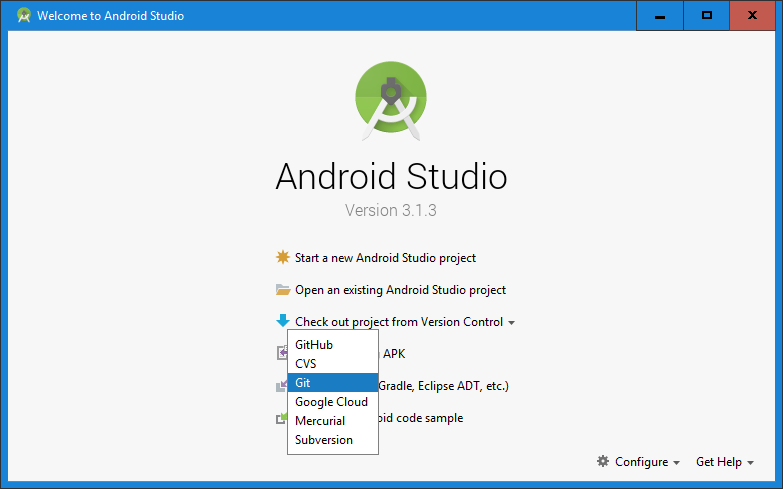
- Use git clone in Android Studio as shown in screenshots below. Select “Check out project from Version Control” with “Git” as concrete version control system.
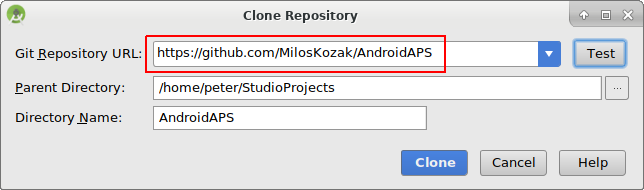
Fill in the URL to the main AndroidAPS repository (“https://github.com/MilosKozak/AndroidAPS”) and click “clone”.
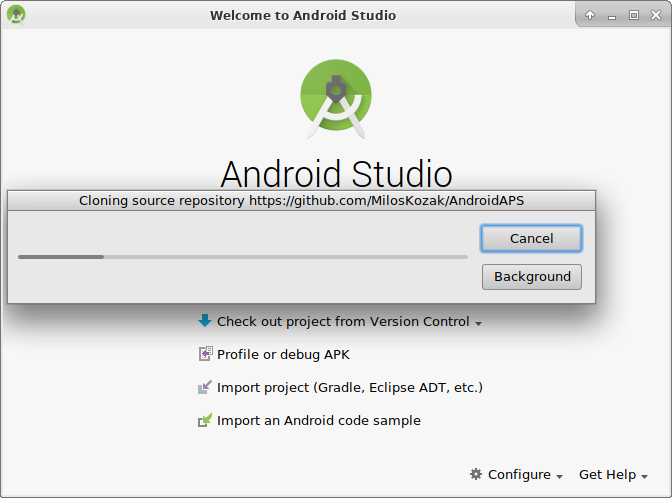
Android Studio will start cloning. Don’t click “Background” as it goes fast and makes things more complicated at the moment.
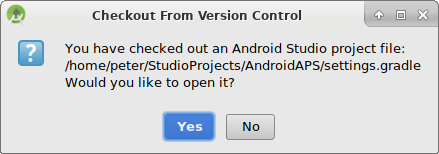
Finish the checkout from version control with opening the project by clicking “Yes”.
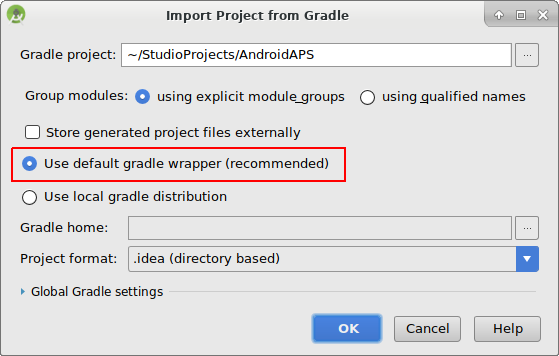
Use the standard “default gradle wrapper” and click “OK”.
Read and close the “Tip of Day” screen of Android Studio by pressing “Close”.

- Excellent, you have your own copy of the source code and are ready to start the build.
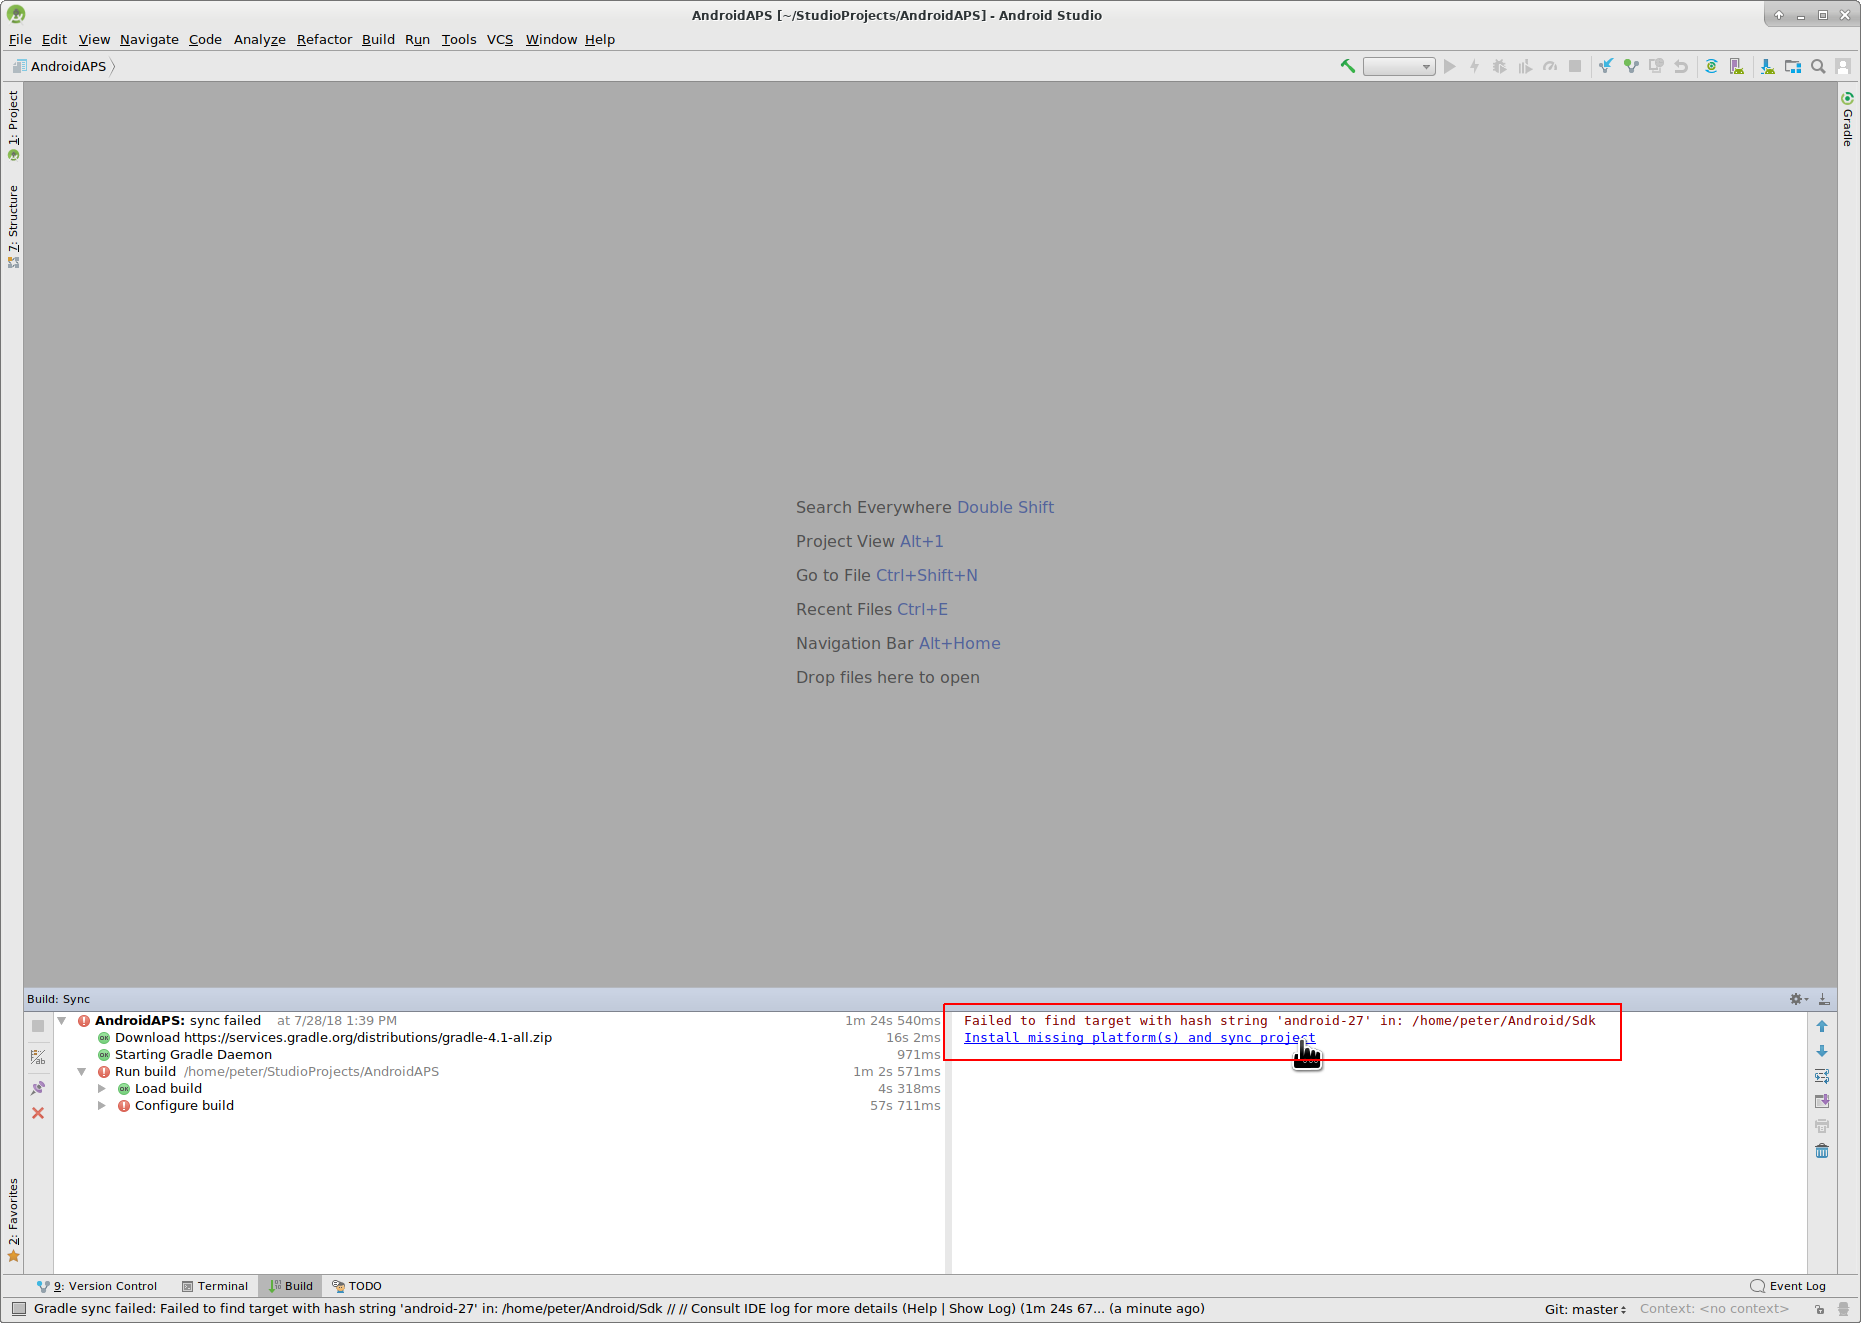
- Now we are approaching our first error message. Fortunately, Android Studio will directly give us the solution for this.
Click “Install missing platform(s) and sync project” as Android Studio needs to install a missing platform.
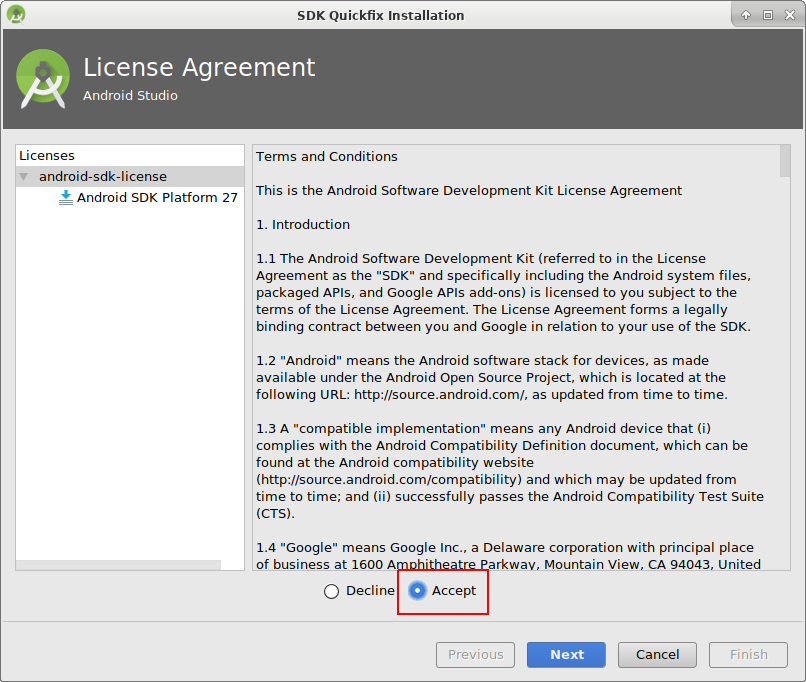
Accept the license agreement by selecting “Accept” and clicking “Next”.
As it is said in the dialog please wait until the download is finished.
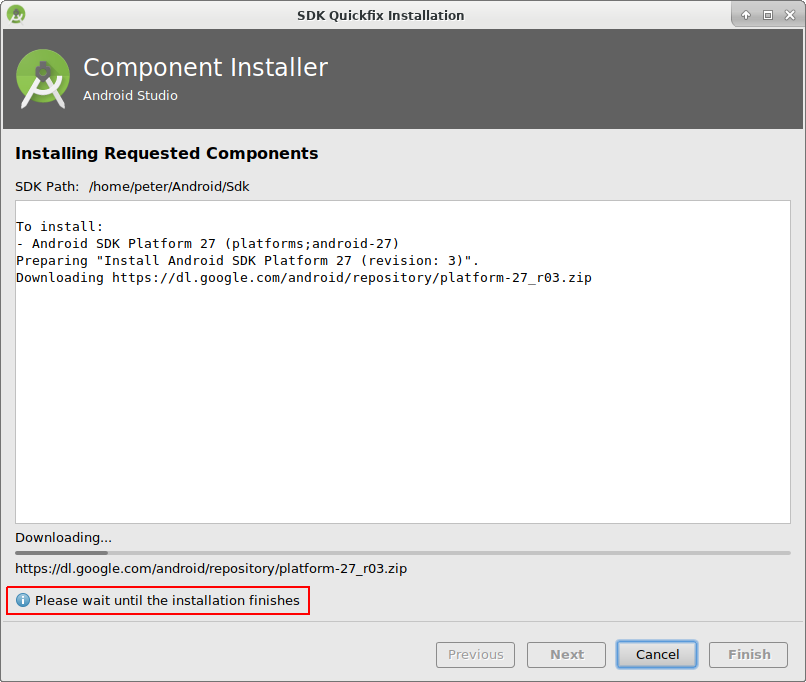
Now it’s finished. Please click “Finish”.

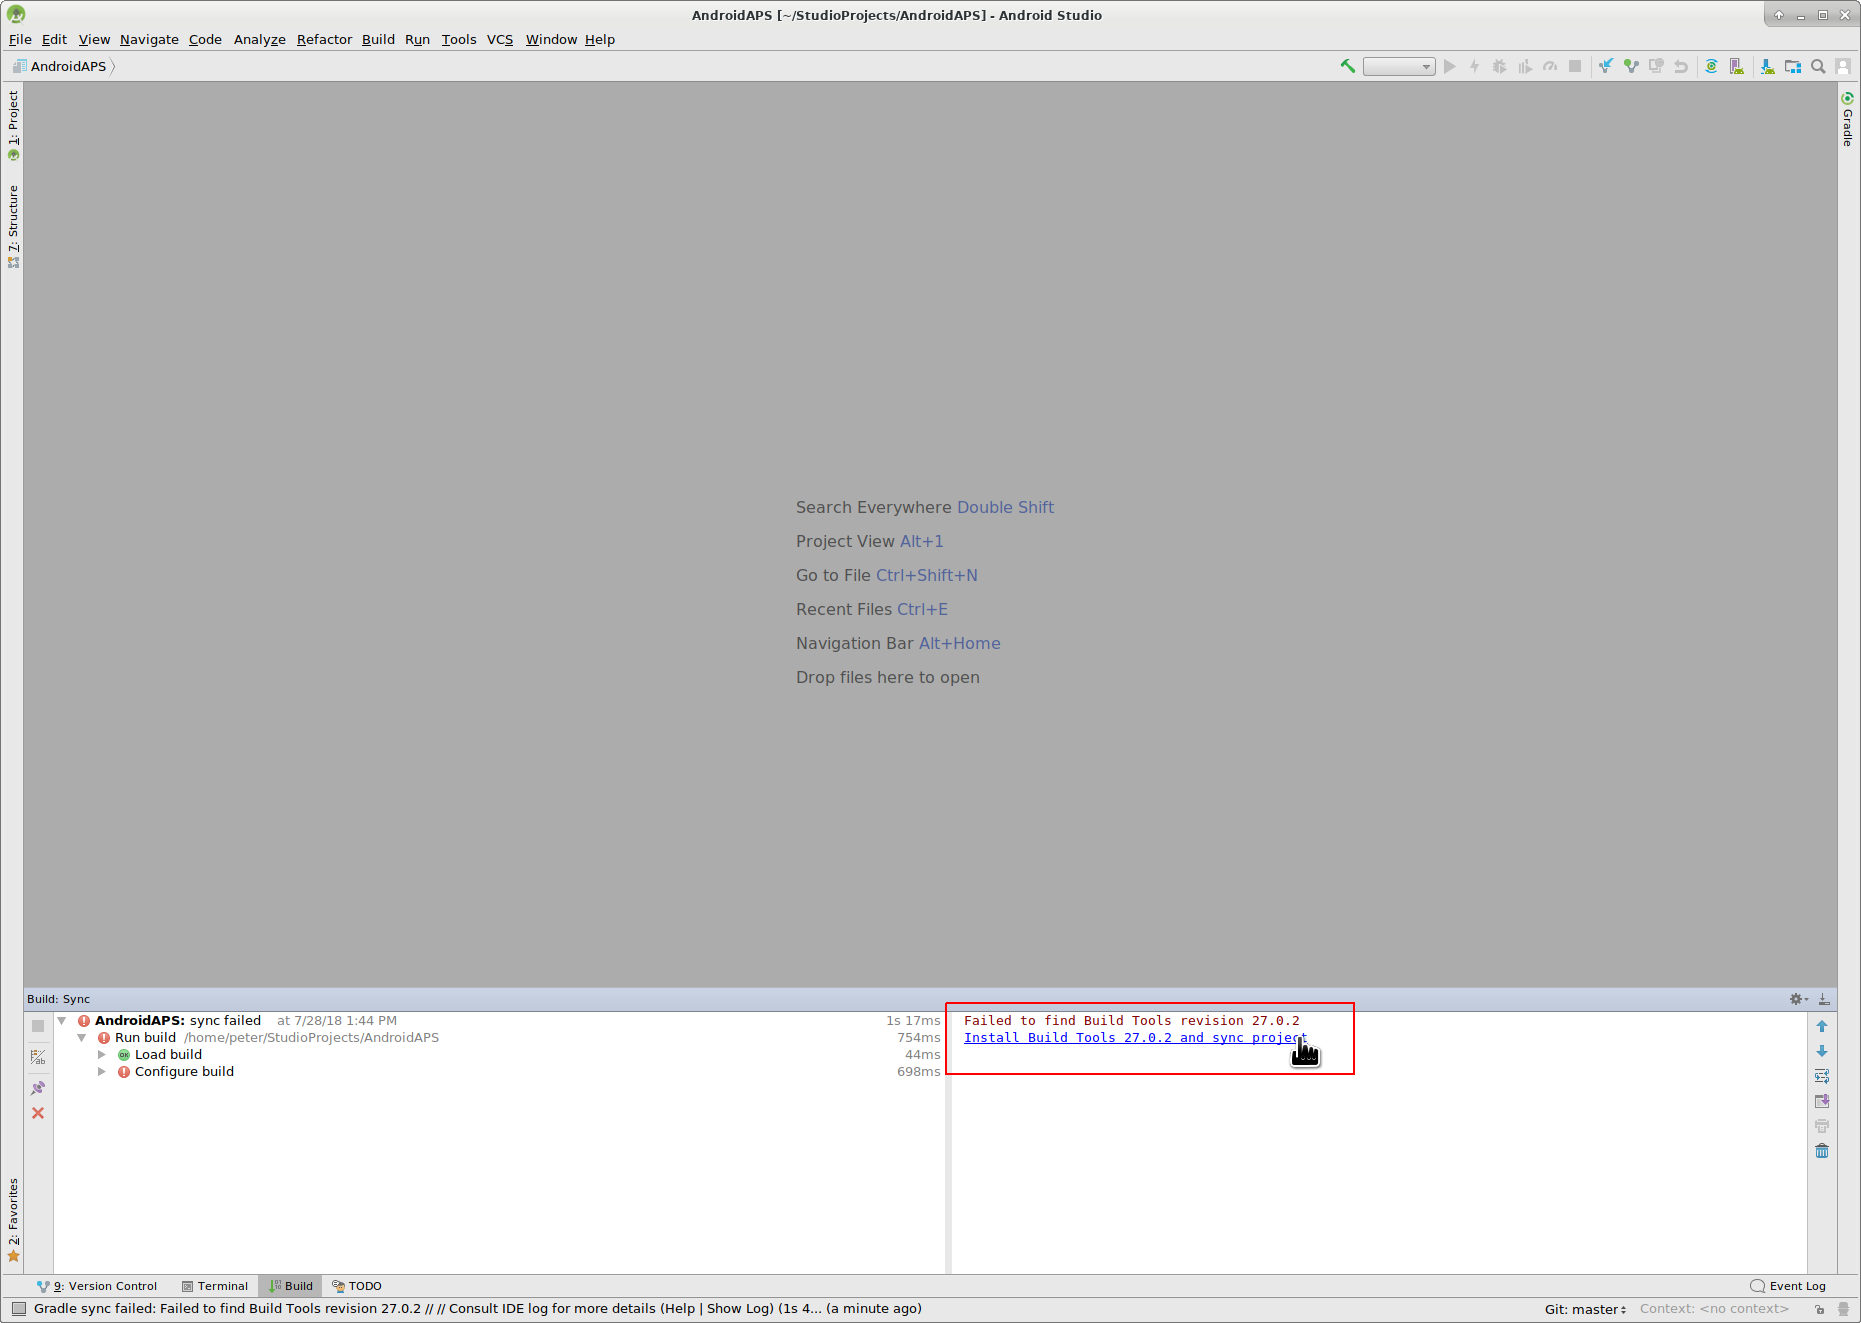
Aaaahhh, next error. But Android Studio suggests a similar solution. Click “Install Build Tools and sync project” as Android Studio needs to download missing Tools.
As it is said in the dialog please wait until the download is finished.
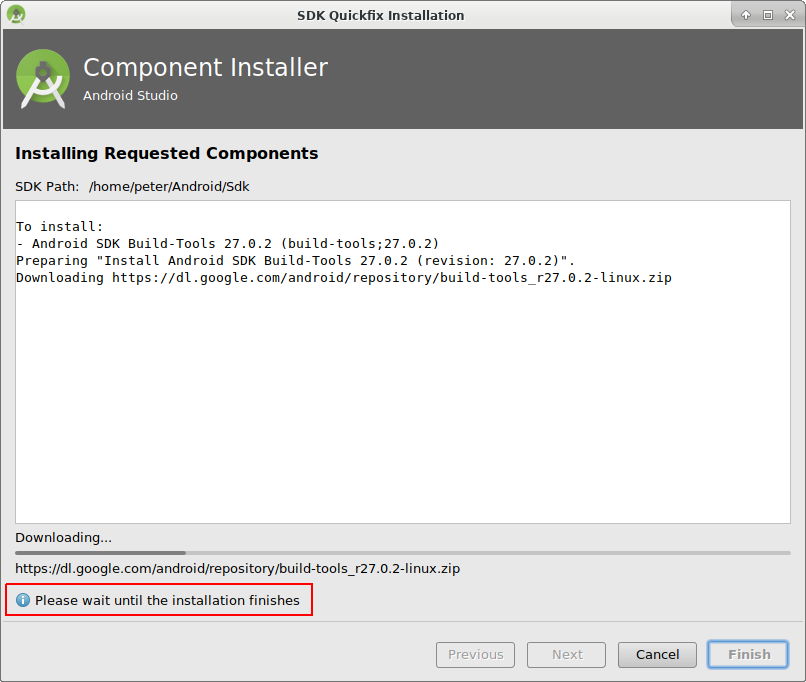
Now it’s finished. Please click “Finish”.

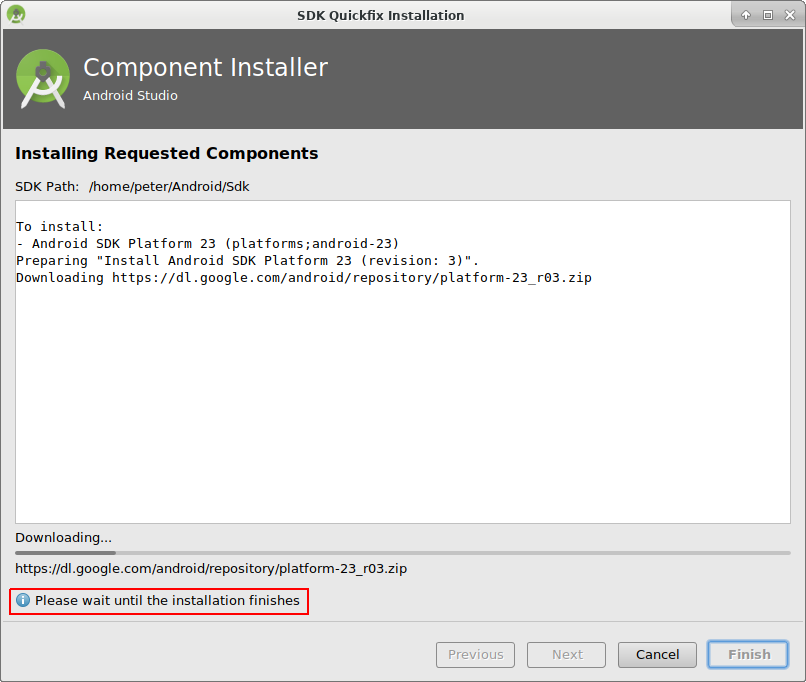
And another error to handle as Android Studio needs to download again a missing platform. Click “Install missing platform(s) and sync project”.

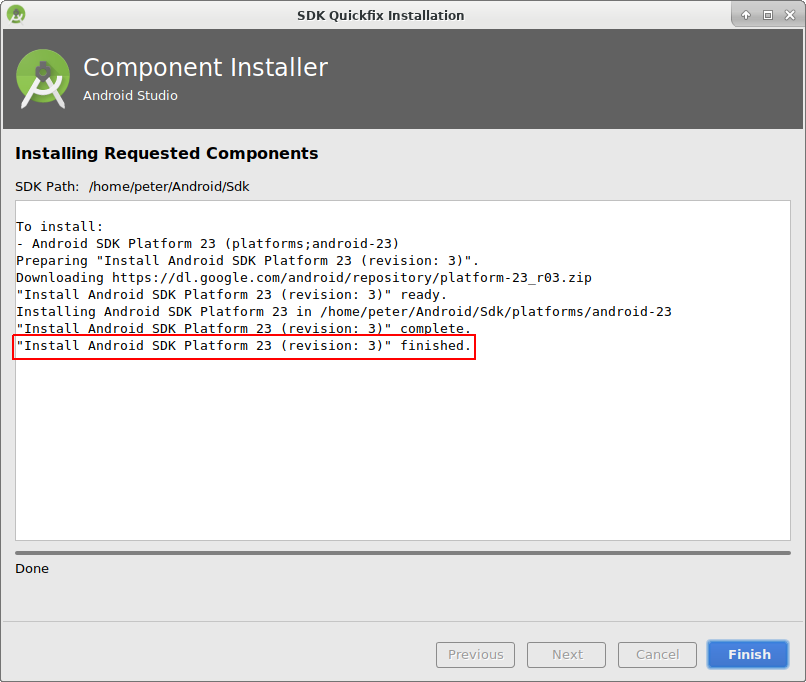
As it is said in the dialog please wait until the download is finished.
Now it’s finished. Please click “Finish”.
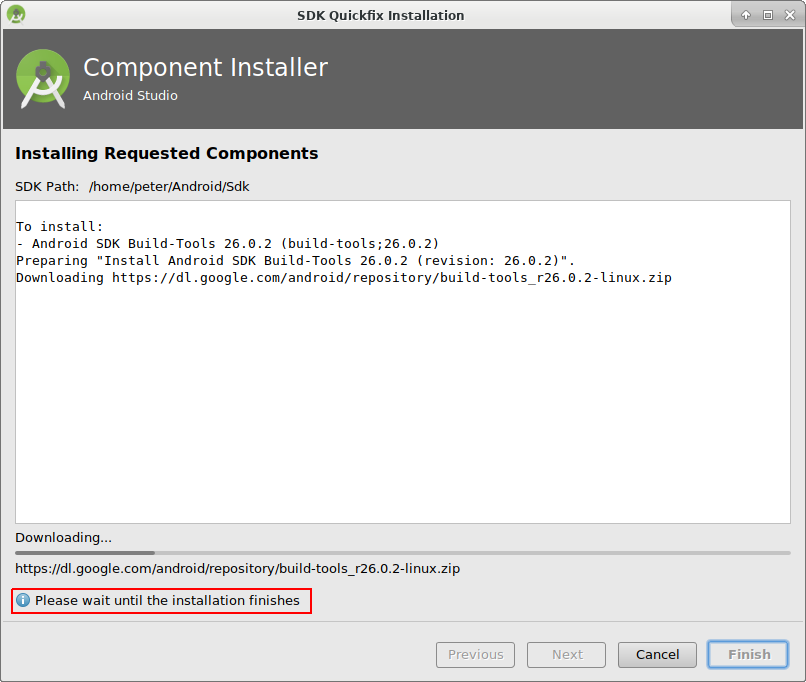
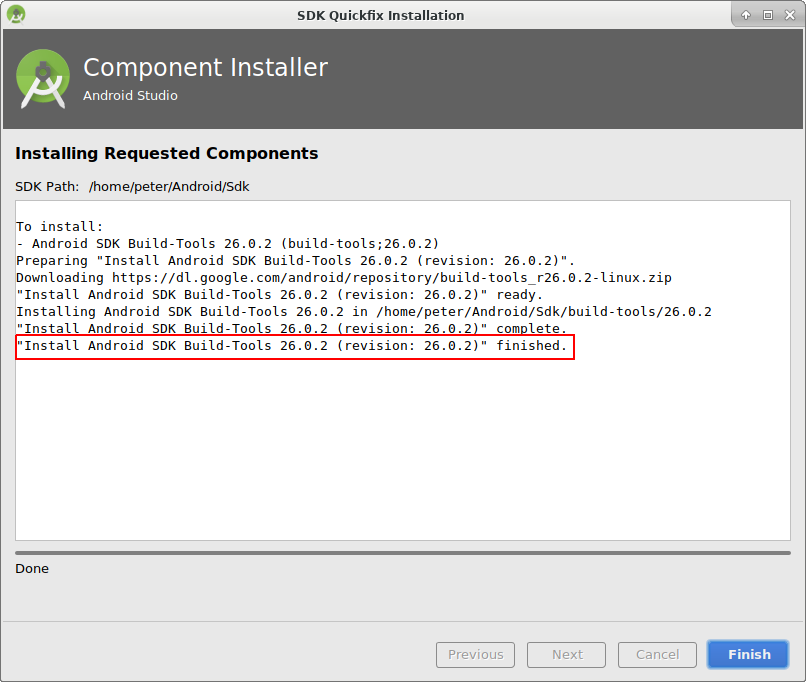
Click “Install Build Tools and sync project” as Android Studio needs to download missing Tools.

As it is said in the dialog please wait until the download is finished.
Now it’s finished. Please click “Finish”.
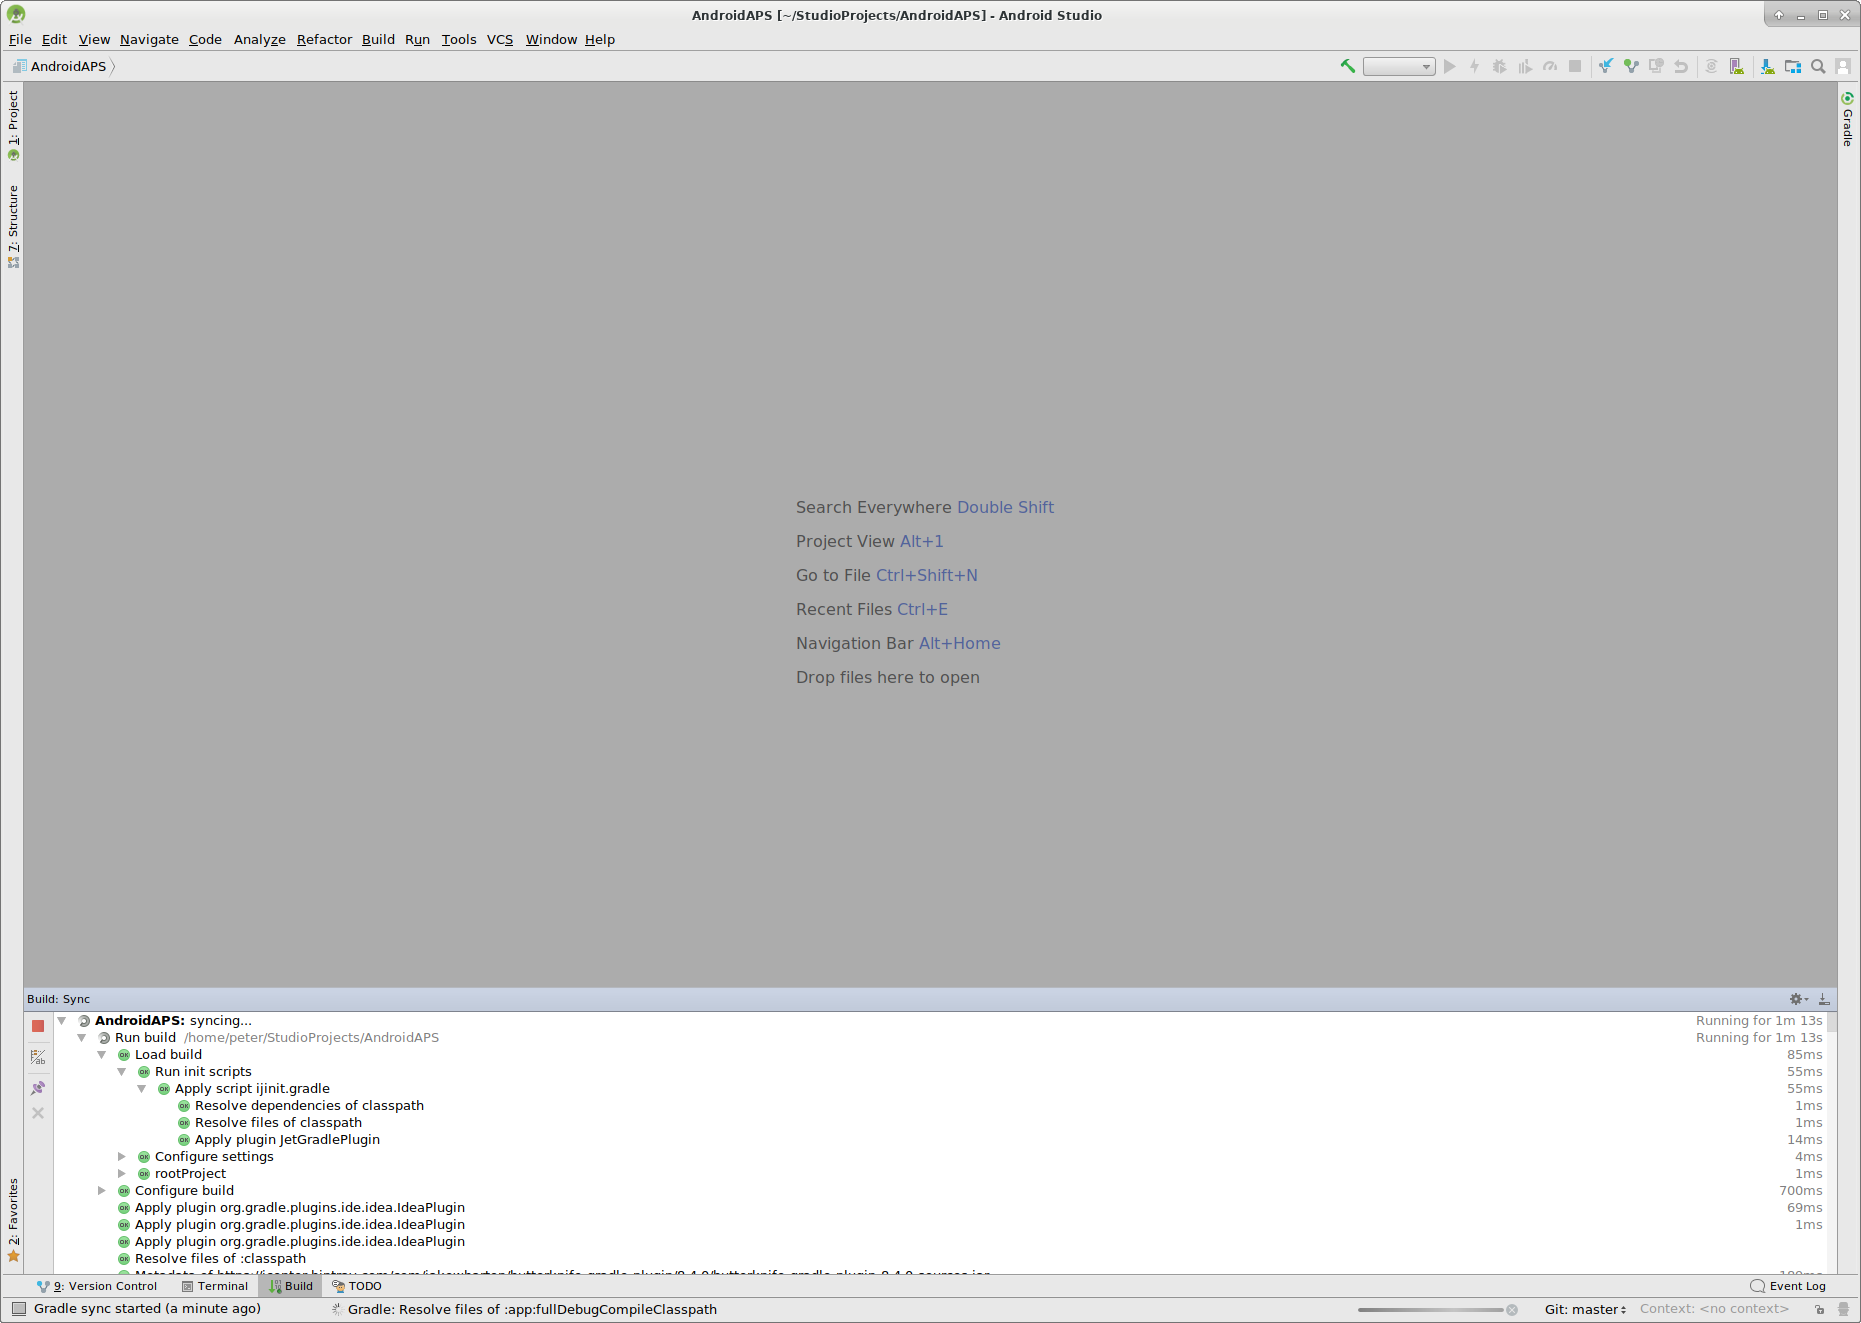
Yeah, the error messages are gone and the first gradle build is runing. Maybe it’s time to drink some water?
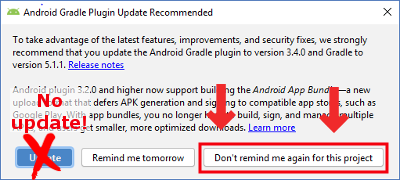
Android Studio recommends to update the gradle system. Never update gradle! This might lead to difficulties!
Please click “Don’t remind me again for this project”.
The build is running again.
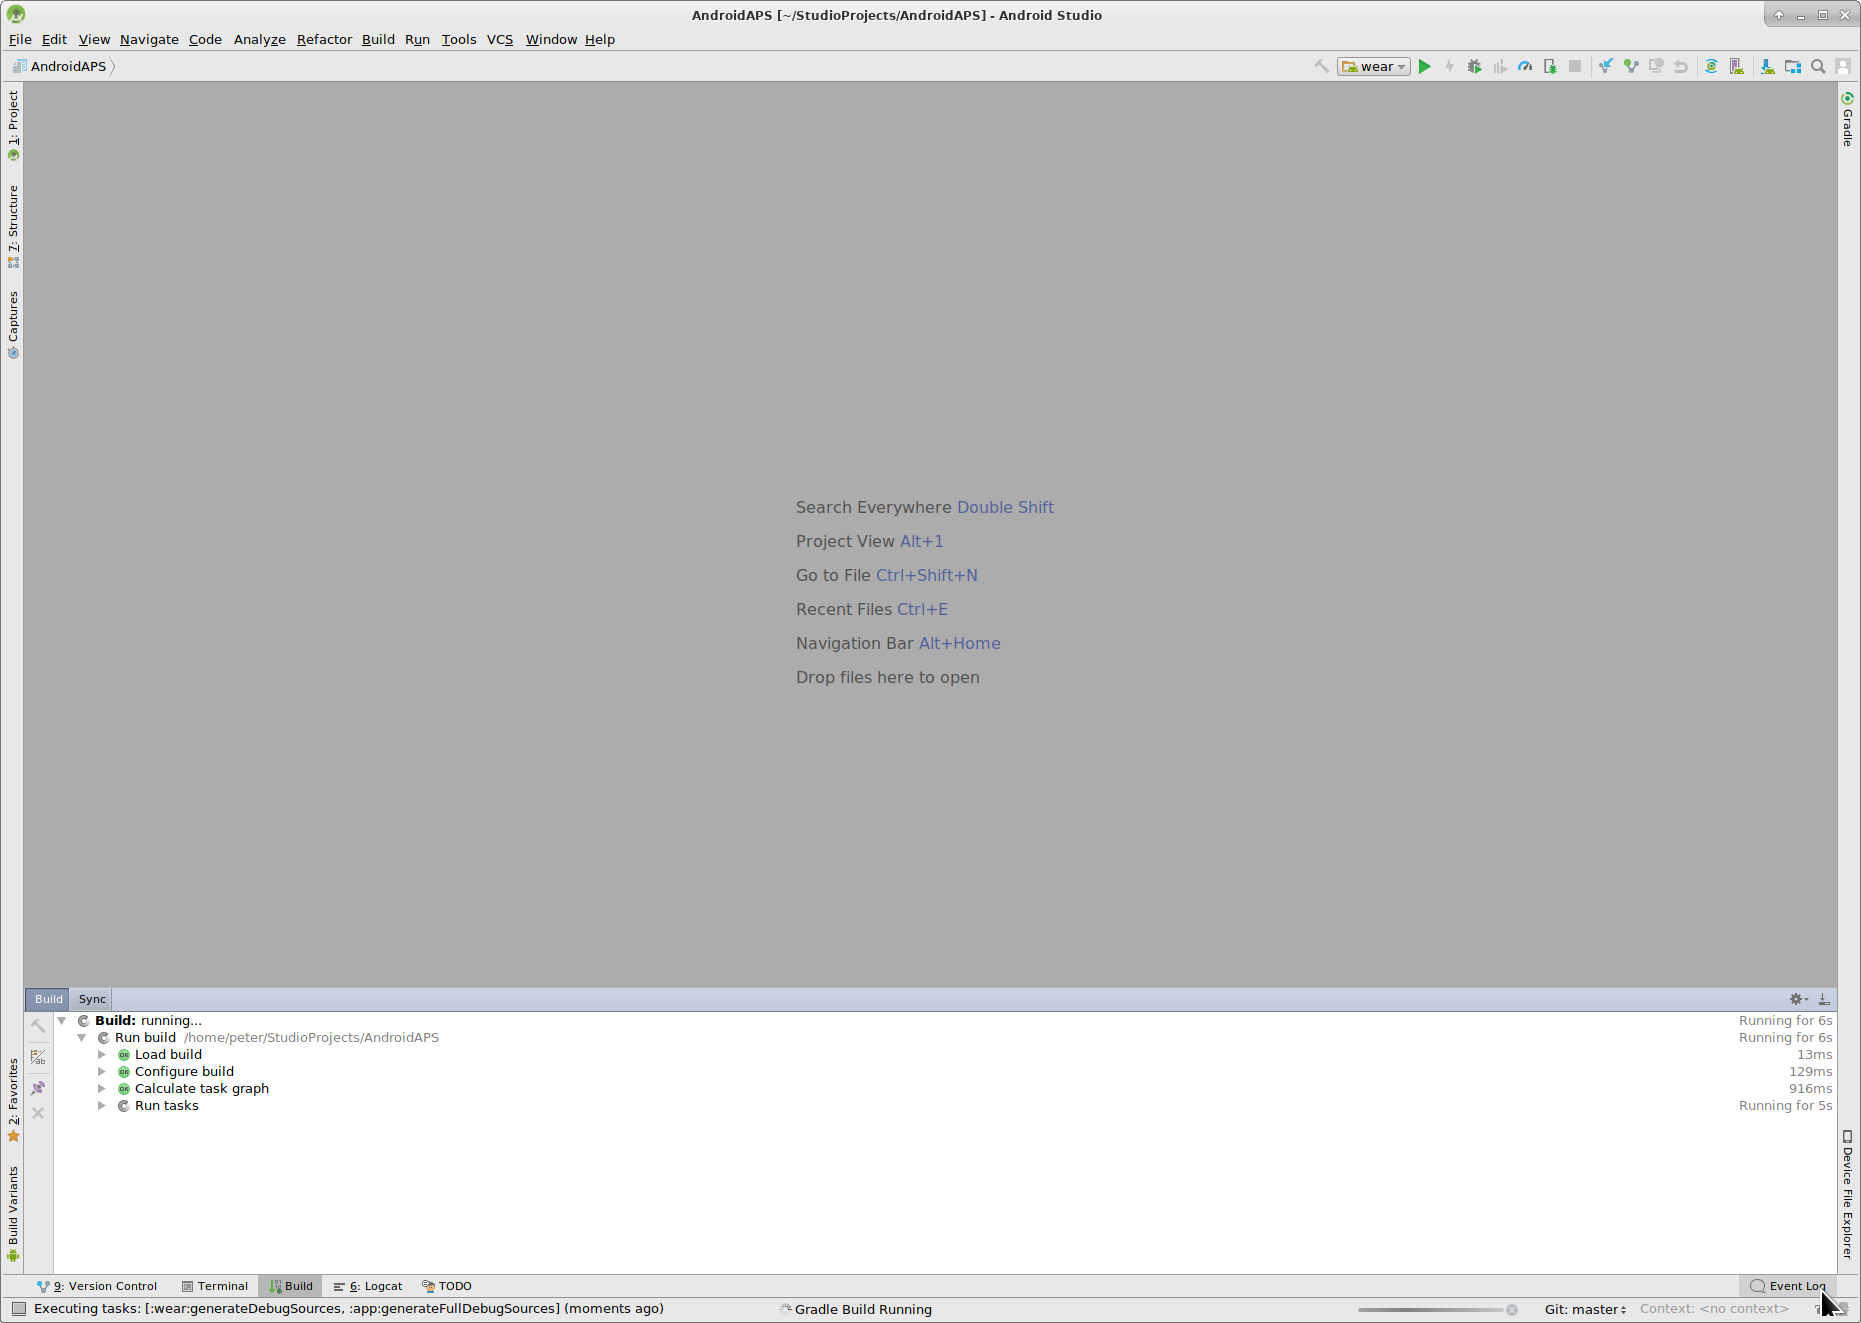
Yeah, the first build is successful but we are not finished.
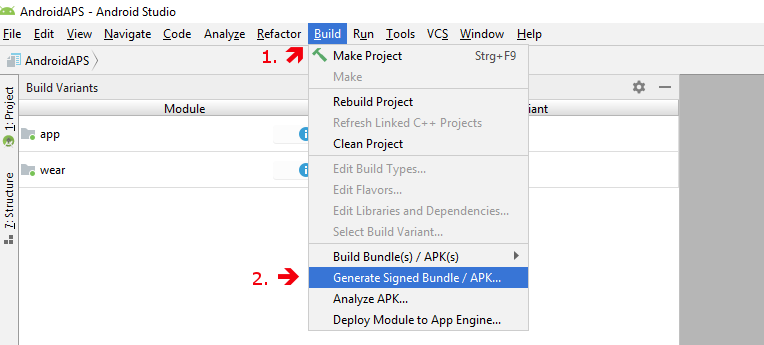
Δημιουργία υπογεγραμμένου APK
Στο μενού επιλέξτε “Δημιουργία” και, στη συνέχεια, “Δημιουργία υπογεγραμμένης δέσμης / APK...”. (Το μενού στο Android Studio άλλαξε από τον Σεπτέμβριο του 2018. In older versions select in the menu “Build” and then “Generate Signed APK...”.)
Signing means that you sign your generated app but in a digital way as a kind of digital fingerprint in the app itself. Αυτό είναι απαραίτητο επειδή το Android έχει έναν κανόνα ότι δέχεται μόνο υπογεγραμμένο κώδικα για εκτέλεση για λόγους ασφαλείας. Για περισσότερες πληροφορίες σχετικά με αυτό το θέμα, ακολουθήστε τον σύνδεσμο εδώ Η ασφάλεια είναι ένα βαθύ και πολύπλοκο θέμα και δεν το χρειάζεστε τώρα.
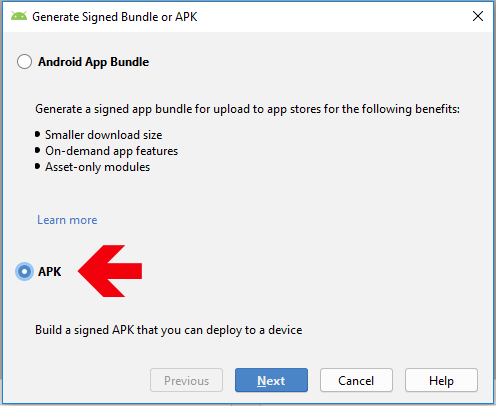
Στο παρακάτω παράθυρο διαλόγου επιλέξτε “APK” αντί για “Bundle Android App” και κάντε κλικ στο κουμπί “Επόμενο”.
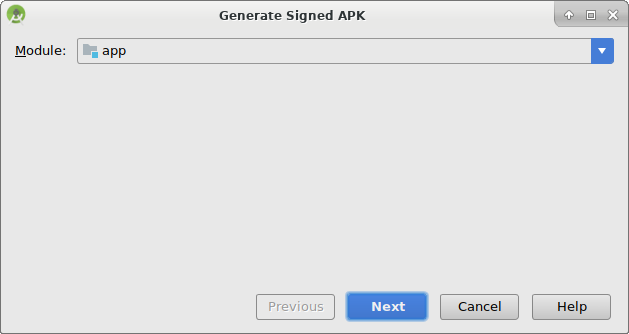
Επιλέξτε “εφαρμογή” και κάντε κλικ στο κουμπί “Επόμενο”.
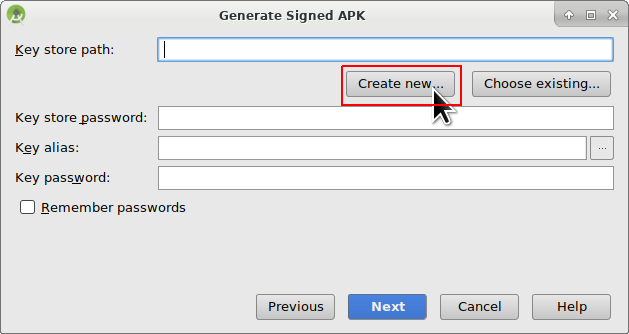
Click “Create new...” to start creating your keystore. A keystore in this case is nothing more than a file in which the information for signing is stored. It is encrypted and the information is secured with passwords. We suggest storing it in your home folder and remember the passwords but if you lose this information it’s not a big issue because then you just have to create a new one. Best practice is to store this information carefully.
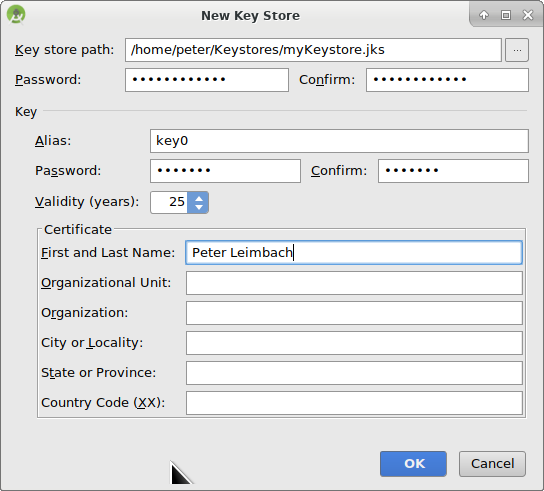
- Fill in the information for the next dialog.
- Key store path: is the path to the keystore file. Do not save in same folder as projekt. You must use a different directory!
- The password fields below are for the keystore to double check for typing errors.
- Alias is a name for the key you need. You can leave the default or give it a fancy name you want.
- The password fields below the key are for the key itself. As always to double check for typing errors.
- You can let the validity at the default of 25 years.
- You only have to fill out first name and last name but feel free to complete the rest of information. Then click “OK”.
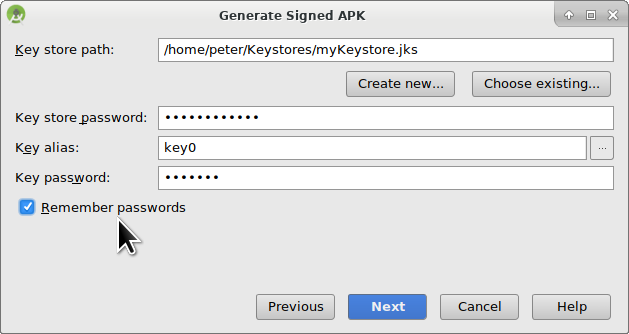
Fill in the information of the last dialog in this dialog and click “Next”.
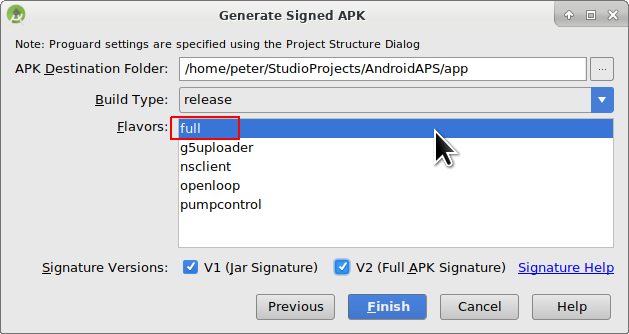
Select “full” (or “fullRelease”) as flavour for the generated app. Select V1 “Jar Signature” (V2 is optional) and click “Finish”. Οι ακόλουθες πληροφορίες μπορεί να είναι σημαντικές για μεταγενέστερη χρήση.
- Το “Απελευθερωμένο” θα πρέπει να είναι η προεπιλεγμένη επιλογή σας για το “Τύπος κατασκευής”, το “Debug” είναι μόνο για τους ανθρώπους που κωδικοποιούν.
- Επιλέξτε τον τύπο κατασκευής που θέλετε να δημιουργήσετε.
- full / fullRelease (i.e. recommendations automatically enacted in closed looping)
- ανοιχτό κύκλωμα (δηλ. συστάσεις που δίδονται στο χρήστη να χειρίζεται με μη αυτόματο τρόπο)
- έλεγχος αντλίας (δηλαδή τηλεχειριστήριο για αντλία, χωρίς κύκλωμα)
- nsclient (δηλ. εμφανίζονται τα δεδομένα του κυκλώματος ενός άλλου χρήστη και μπορούν να προστεθούν καταχωρήσεις στην εξυπηρέτηση)
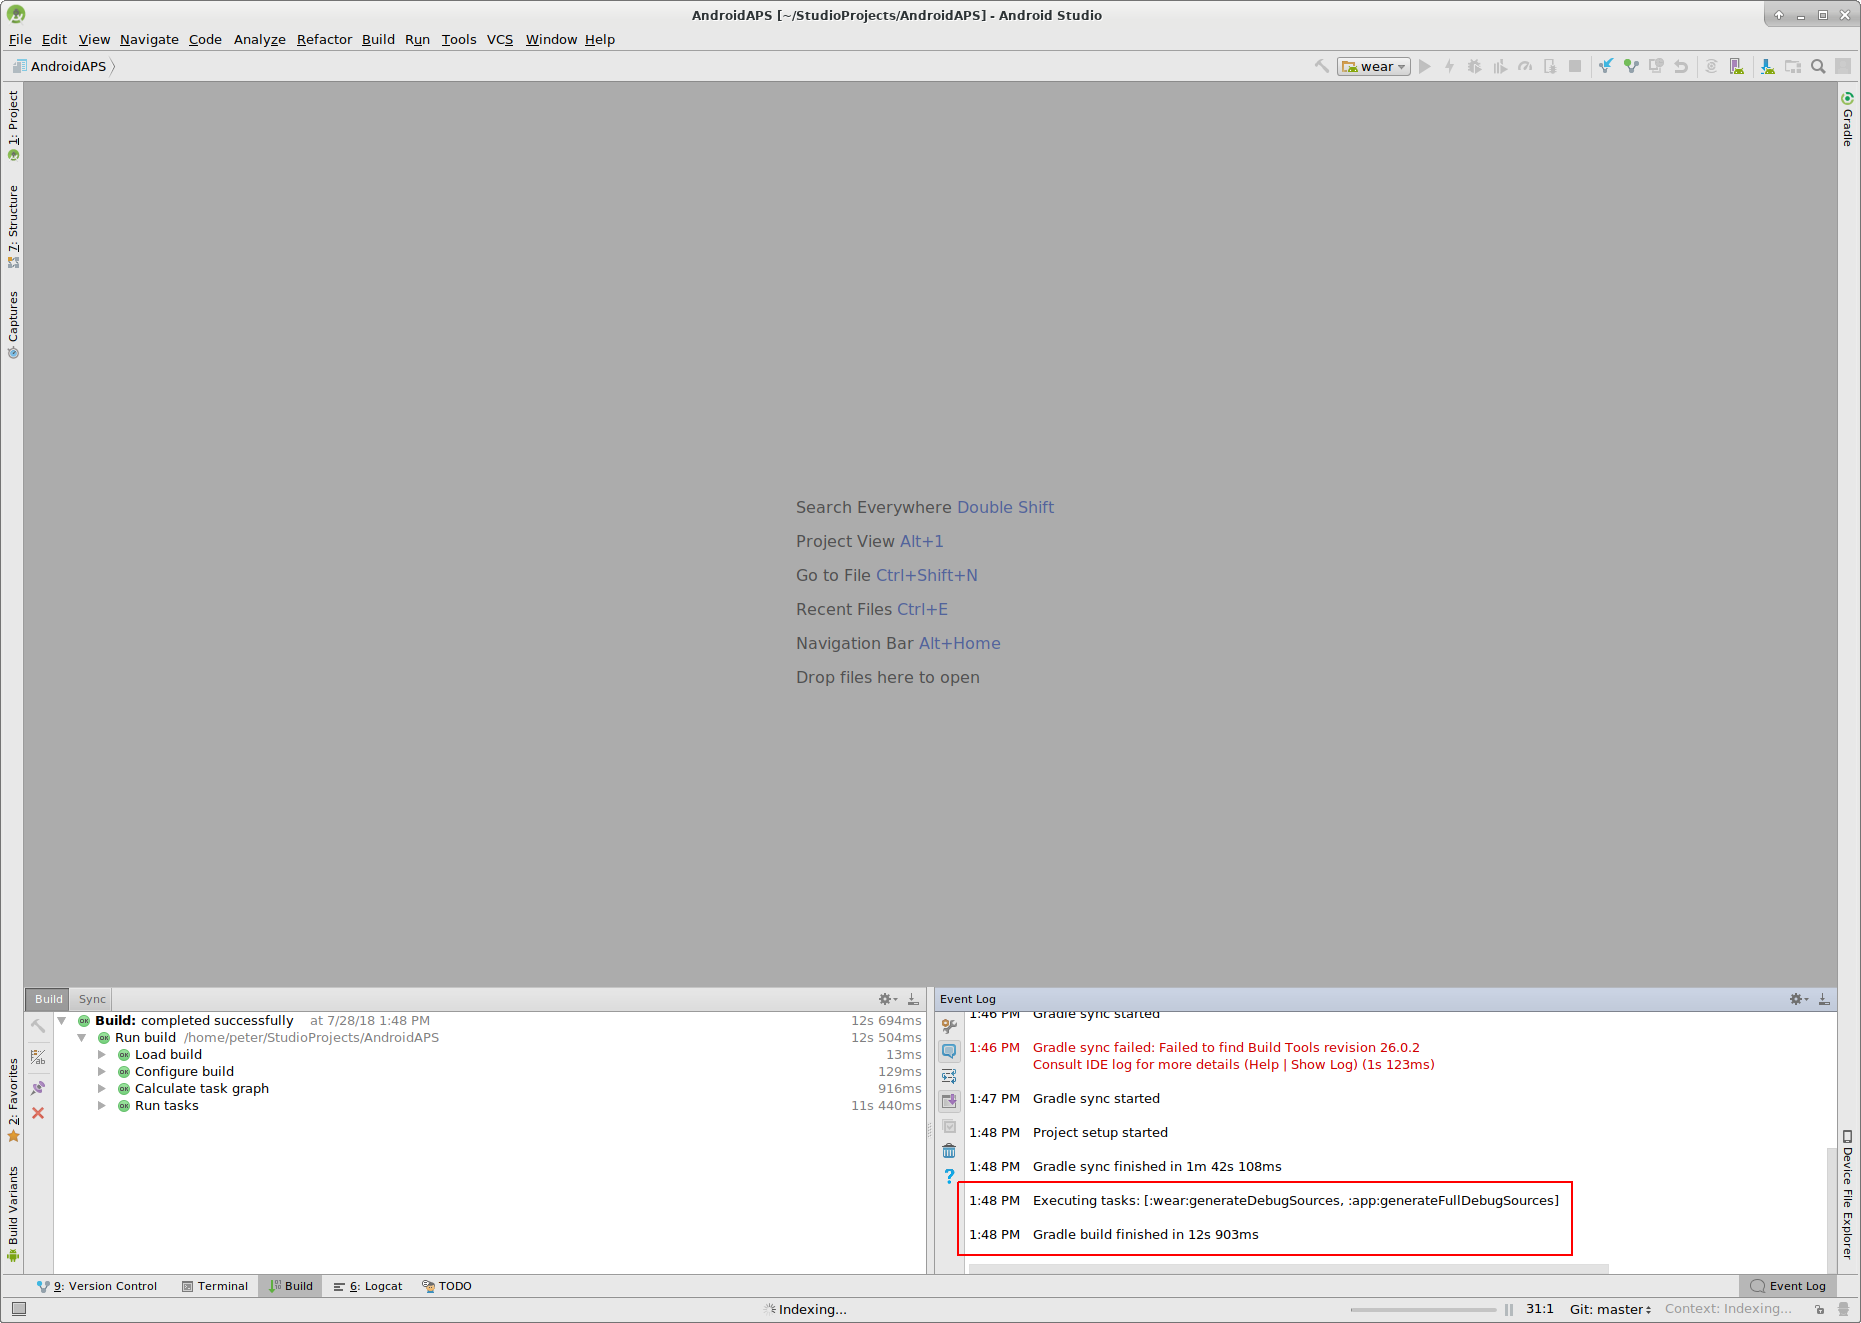
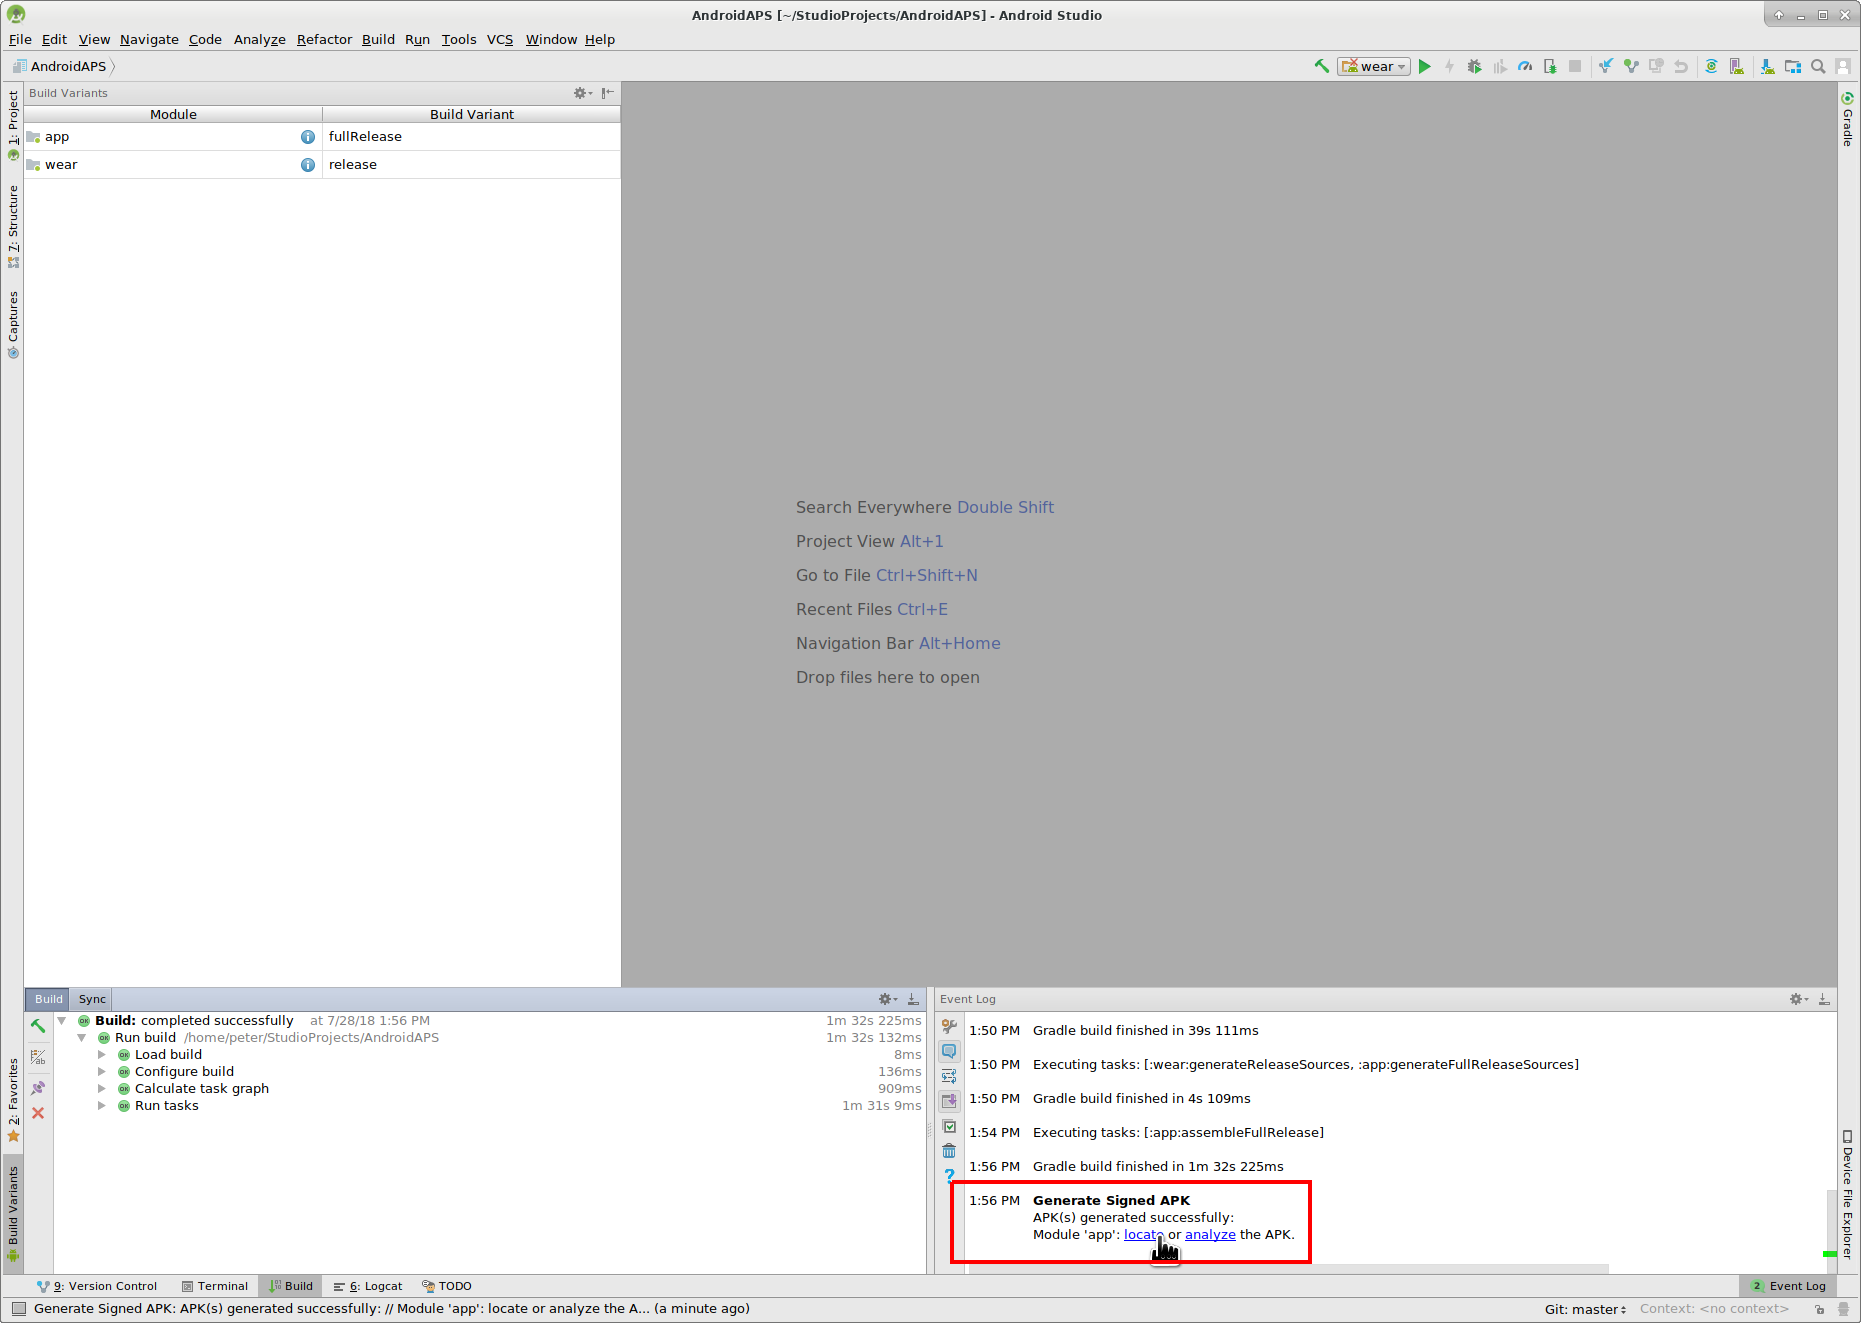
Στο αρχείο καταγραφής συμβάντων βλέπετε ότι το υπογεγραμμένο APK δημιουργήθηκε με επιτυχία.
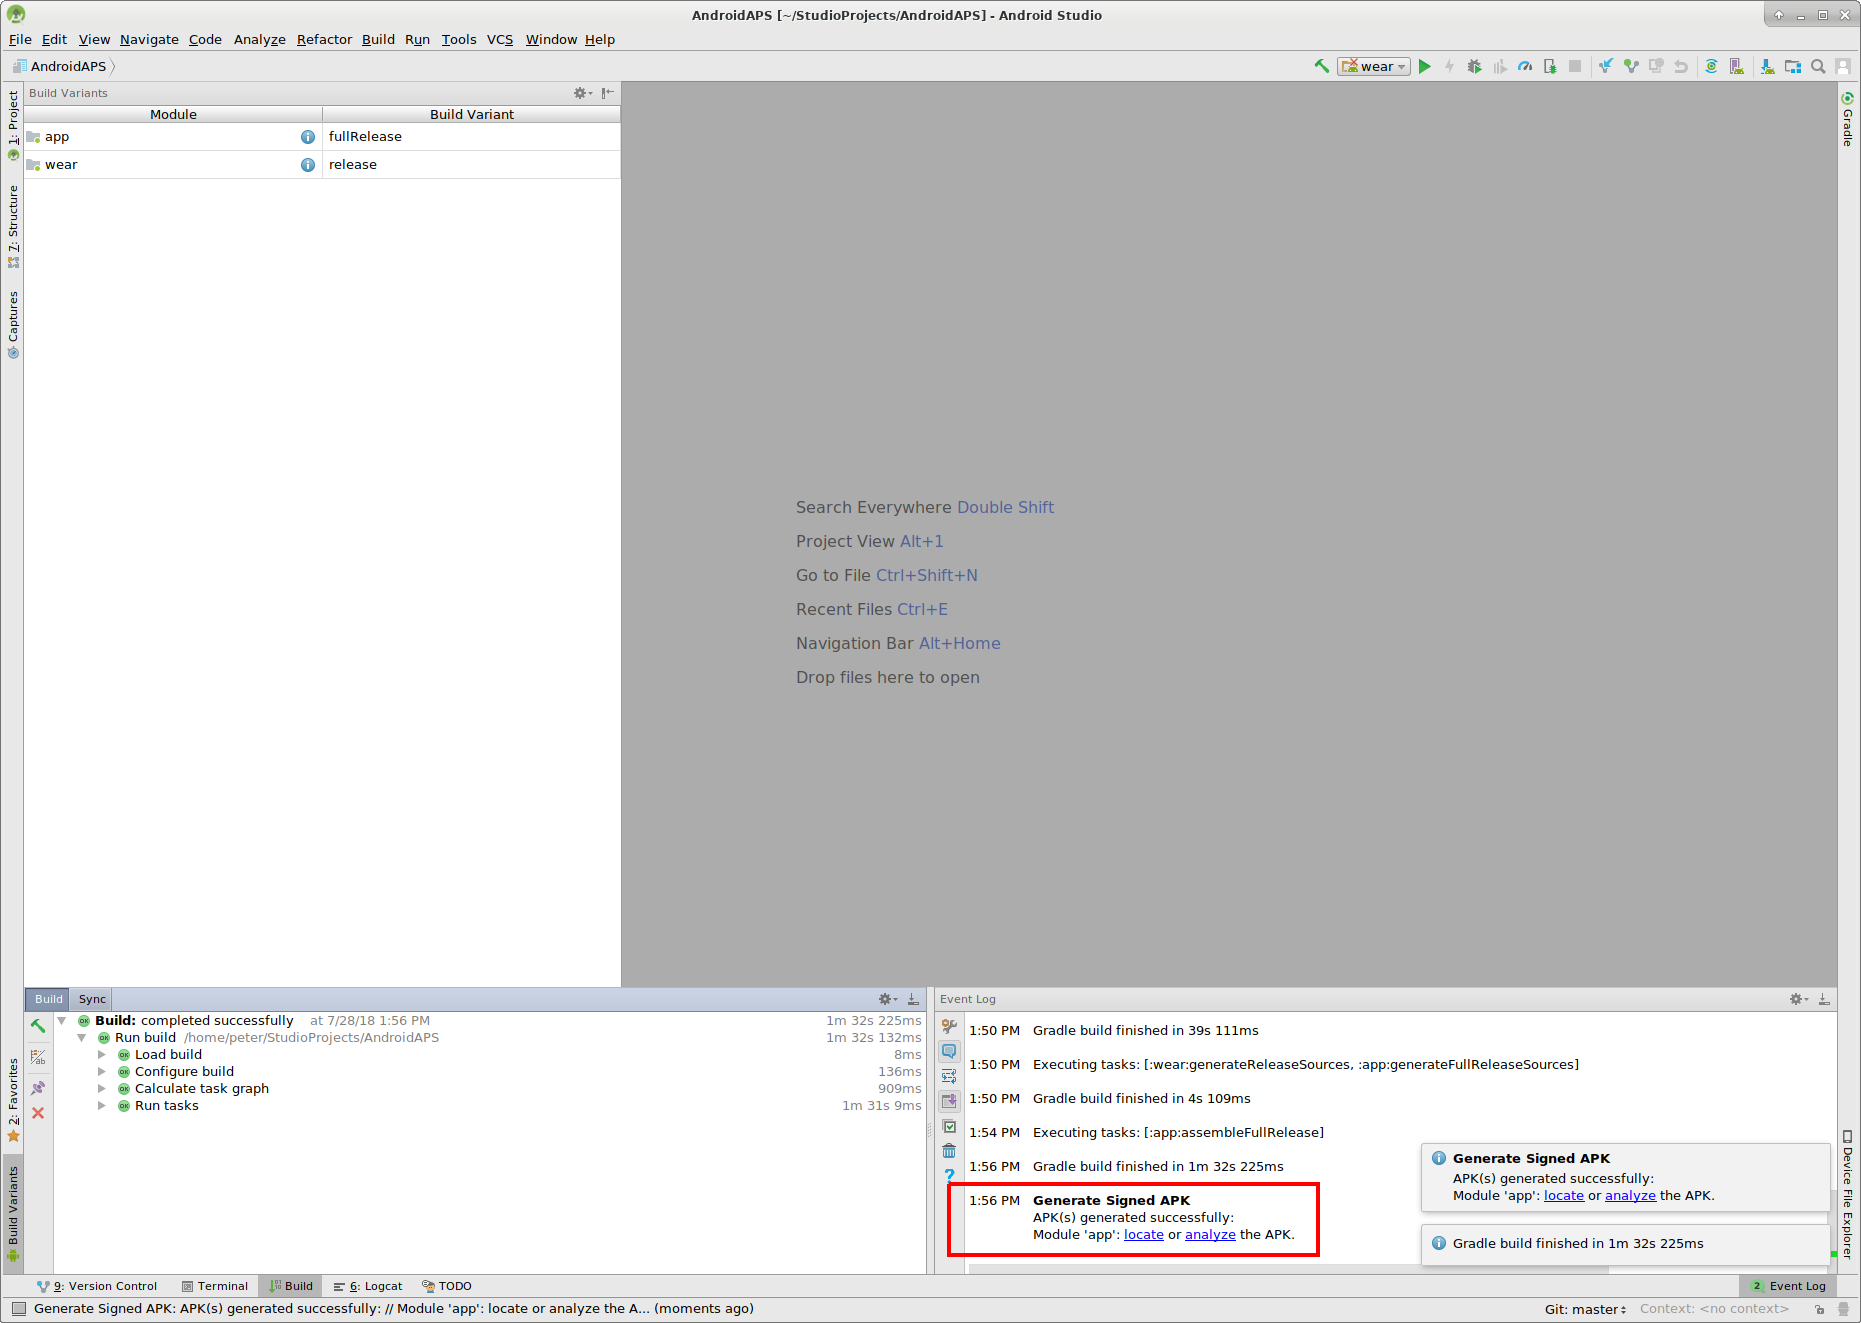
Κάντε κλικ στο σύνδεσμο “εντοπίστε” στο αρχείο καταγραφής συμβάντων.
Μεταφορά APK σε smartphone
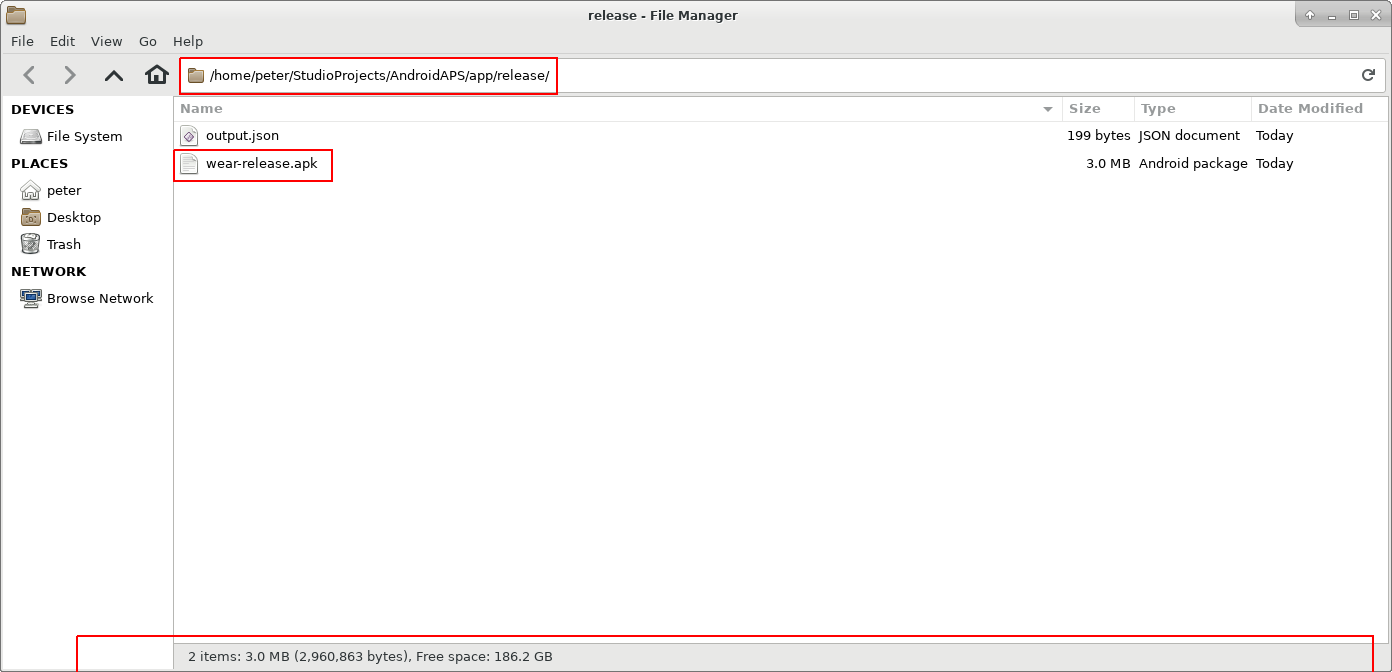
Ανοίγει ένα παράθυρο διαχειριστή αρχείων. Μπορεί να φαίνεται λίγο διαφορετικό στο σύστημά σας καθώς χρησιμοποιώ το Linux. Στα Windows θα υπάρχει η Εξερεύνηση αρχείων και στο Mac OS X ο εξερευνητής. Εκεί θα πρέπει να δείτε τον κατάλογο με το αρχείο APK που δημιουργήθηκε. Δυστυχώς, αυτό είναι λάθος, καθώς το “wear-release.apk” δεν είναι η υπογεγραμμένη εφαρμογή APK που ψάχνουμε.
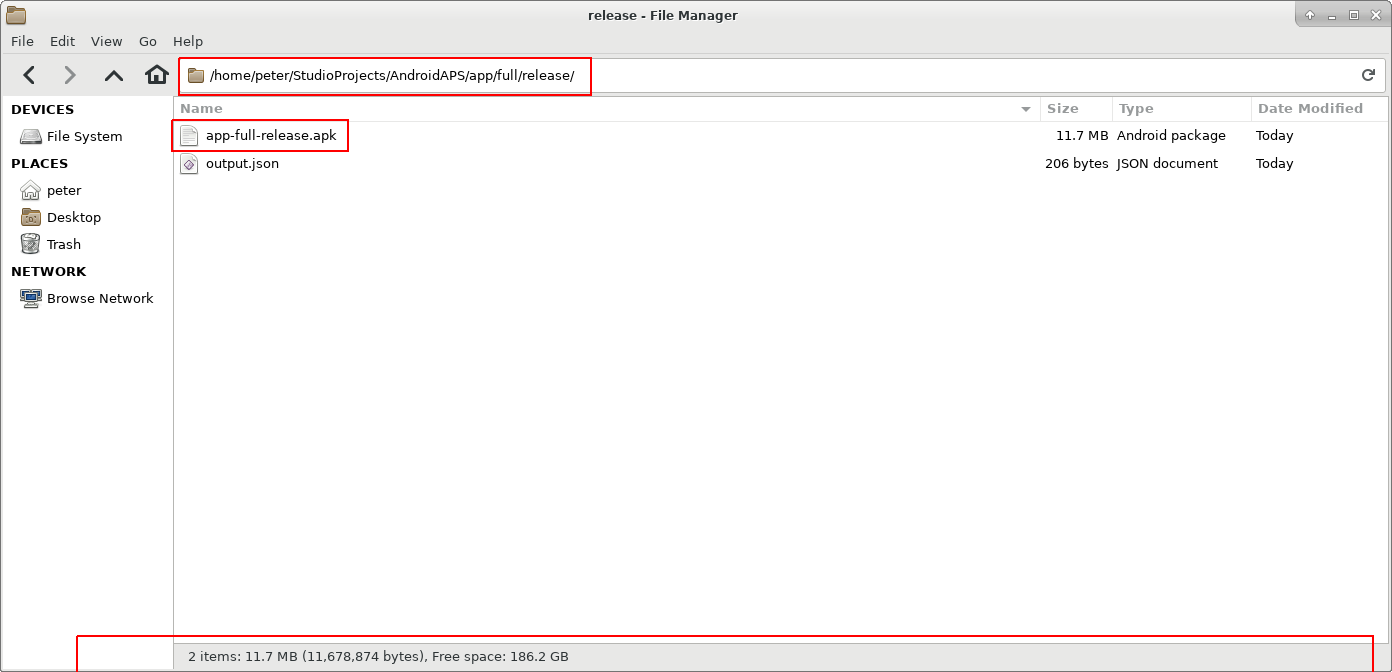
Μεταβείτε στον κατάλογο AndroidAPS / εφαρμογή / πλήρεις/ release για να βρείτε το αρχείο “app-full-release.apk”. Μεταφέρετε αυτό το αρχείο στο Android smartphone σας. You can do it on your preferred way, i.e.
- Bluetooth
- cloud upload (Google Drive or other cloud services)
- connect computer and phone by cable
- by mail (Note that some mail apps do not allow apk attachments, in this case use other transfer method.)
In this example Gmail is used as it is fairly simple. To install the self-signed app you need to allow Android on your smartphone to do this installation even if this file is received via Gmail which is normally forbidden. Αν χρησιμοποιείτε κάτι άλλο παρακαλούμε προχωρήστε ανάλογα.
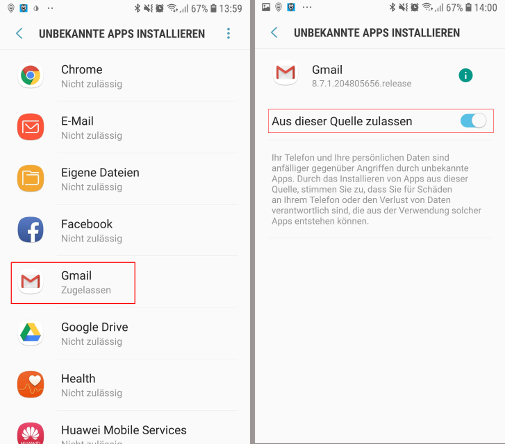
Στις ρυθμίσεις του smartphone σας υπάρχει μια περιοχή “Άγνωστη εγκατάσταση εφαρμογών”, όπου πρέπει να δώσω στο Gmail το δικαίωμα να εγκαταστήσει αρχεία APK που λαμβάνω μέσω του Gmail.
Επιλέξτε “Να επιτρέπεται από αυτή την πηγή”. Μετά την εγκατάσταση, μπορείτε να την απενεργοποιήσετε ξανά.
Το τελευταίο βήμα είναι να πατήσετε το αρχείο APK που λαβατε μέσω του Gmail και να εγκαταστήσετε την εφαρμογή. Αν το APK δεν εγκατασταθεί και έχετε μια παλαιότερη έκδοση του AndroidAPS στο τηλέφωνό σας που έχει υπογραφεί με διαφορετικό κλειδί τότε θα πρέπει πρώτα να την απεγκαταστήσετε, να θυμάστε να εξάγετε τις ρυθμίσεις σας αν το κάνετε!
Ναι, το πήρατε και τώρα μπορείτε να ξεκινήσετε με τη ρύθμιση του AndroidAPS για τη χρήση σας (CGMS, αντλία ινσουλίνης) κλπ.
Identify receiver if using xDrip+
Αντιμετώπιση προβλημάτων
See separate page troubleshooting Android Studio.